24 February 2010

Mizzen sheet cleats, boarding ladder and yuloh pivot


I have made the first alteration to the rig. Currently the mizzen sheets are cleated to little cam cleats on the side decks, outside the coaming. Quite neat, but they are out of sight and you have to reach blindly behind your back to adjust them. I noticed on the review of BayCruiser no 2 in WaterCraft that the mizzen cleats were fixed to knees in the aft corners of the cockpit and this looked a much better idea. The cleat is visible and the sheet drops into the  cockpit. It also means the sheet doesn't foul any stern mooring ropes. I have copied this detail, using a piece of mahogany from an old table to form the knees. All epoxied into place and seems very strong. I am just wondering if I should put some screws into it as well. Only testing at sea will prove its worth.

No2 also has a main sheet track acros the back of the cockpit. I shan't copy this, but I have fixed a rope horse across to see if that has any effect one way or the other. 
I have bolted the boarding ladder platform in place and it seems to work well. The extended ladder will go well beow the water surface, with at least two rungs below water. I think it will just about be able to deploy it from the water, but time will tell.
I am hoping to make and fit a Chinese yuloh, a single sculling oar. For this I need a pivot point on the stern. To create this I have laminated a block on the edge of the ladder platform and fitted a carriage bolt through it. The domed head is to be the pivot. This just fits into a brass water pipe end stop, which I want to use as the socket on the underside of the yuloh. Now I need to make the oar itself. That could be quite a challenge, I have no idea quite what I need to do.

23 February 2010

The English RAID, July 28 - Aug 1, Solent

I have worked up a Google map of the basic route of the RAID. I will add to it as I get more information. This is not an official map, just one I am playing with.

View English RAID 2010July 28 - Aug 1 in a larger map

19 February 2010

Transatlantic Fame

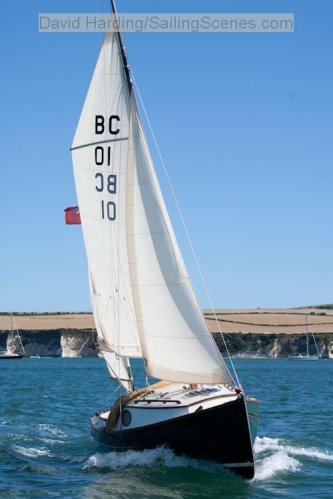
This photo of Daisy Grace, with Matt Newland her designer and builder, was published in the latest issue of Woodenboat magazine under the Recent Launchings section. I was just about to get in her for my first sail.

12 February 2010

The English Raid, The Solent July 28 - Aug 1, 2010

There is going to be a RAID in the Solent, July 28 -Aug 1 2010. The first English RAID. I am hoping to be there with Daisy G. and there are several other Swallowboats on the list. Not sure about the rowing bit...

http://www.raidengland.org/ for details.

11 February 2010

Sorting out a boarding ladder


I have bought a four rung telescopic boarding ladder. Very pleased with it, it seems strong, long and well made. I am going to install it to be stowed on the rear deck on a little platform, and flipped over to be extended. I have roughed out the platform in MDF to get the basic shape. Every edge twists and curves. Next I will make it up in plywood, stain it and screw it to the rear coaming. No need for holes in the transom. All of the weight will come down on the rear deck. The bottom rung should be about 200mm below the water in use. Shan't try it out until the water is warm...

9 February 2010

Sorting out the "heads"

The little portapotti does just fit under the cockpit sole, but as it was installed, the uneveness of the floor due to all the pipework for the ballast tanks meant that it had to be heaved into the cockpit to use it properly. Not a feature appreciated by the crew. I have fixed a plywood floor board across the existing floor planks to give a level, flat surface, and then covered it with an offcut of vinyl flooring from our bathroom. I have also managed to slide another bit of vinyl under the portapotti itself and the ballast pipe. The length of transparent pipe lying between the potti and my bucket (an essential onboard element) is the only exposed bit of the ballast plumbing now visible, which make the cabin interior much more domestic. The loo can also just be pulled out from under the cockpit sole and used in the cabin, which is also a better idea.

This last photo shows how a 25L cool box slots in perfectly at the stern end of the starboard seat, just under the side deck of the cockpit. This was just a standard off the peg box. It is really useful. It can hold enough for a weekend's cruise and is really easy to carry to and fro from the boat. If I am away for a night or two, I put two frozen pints of milk in it as ice blocks. The big "torch" next to it is my trusty Celestron Powertank. It has a 7Ah sealed battery which powers my GPS for most of the season. A standard torch at the top and a huge searchlight underneath for when you really need light. It has two cigarette lighter 12V outlets plus three other lower voltage connections. I take it home about once a month to recharge. I have toyed with installing solar panels to keep it charged, but it hardly seems worth the effort. I may do so if I get any other instruments and it runs down quicker. It is a superb bit of kit, designed for amateur astronomers. You can get it from Amazon for about £50.

6 February 2010

More jobs getting done

Spent a cold afternoon carrying out a few jobs "up at the barn". Was delayed getting there by the local hunt suddenly appearing from down the lane to the barn. Huntsmen in red (or pink as they insist) jackets, whipping in a huge pack of hounds, followed by dozens of riders and finally a small fleet of horse boxes. You wouldn't realise that "hunting with dogs" was now an illegal activity in the UK...

I have finished boxing in behind the sink to create an area to store plates and bowls. Just Plywood and stain, but it looks OK. I have also created a small space where I can put sealed boxes of coffee and tea. It is much tighter than intended as I forgot the plwood is thicker than the MDF I mocked it up with. At least the boxes won't slide out in a sea way now.

One job I did finish a few weeks back was to extend the floor boards to cover the sole of the cabin completely and then cover them with some carpet tiles. Adds weight I know, but it is much more like a cabin now, rather than an enclosed cockpit. I have just about concealed all of the ballast tank plumbing.

Most recently I fitted a shelf/box on the port bulkhead. This will hold flasks, biscuits, glasses and eventually mugs underneath. It projects over the seat a bit, but not too much.

A major job that I have worked on all winter so far is fitting floor boards in the cockpit. These are dirty but finished now. They are in two parts, so the forward section can be lifted to get at the ballast tank hatch. The gaps between the boards give bracing potential for the short-legged. It also means the floor is level right through, so no more stubbed toes. Scribing the sides to the curve of the cockpit as quite a job. I mocked the whole thing up in MDF first of all, which proved an essential step.

I have also moved the hasp of the cockpit locker lock right to the stern so that it doesn't catch your ankles any more. Not so secure, but I would rather a thief unscrewed the latch rather than ripped off the locker cover.

I have also fitted a flag halyard to the mizzen mast so that I can raise an ensign. I bought an off-the-peg mainsail cover which seems to fit fine. It is bright blue and cost £70. If I bought a made to measure one to match the spray hood it would cost £250. I quite like blue.

I have started fitting ropes back onto the mast as I don't actually have many weekends left before spring launching date. That will be about mid-April this year, back in Poole Harbour. I want to get the mast up and all lines fitted for testing before I tow back down to the coast.