14 November 2014
Moving this blog to Wordpress, Nov 2014
I am going to continue this blog on a new Wordpress site. I have got tired of the restrictions and changes that occur to the image library here on Blogspot. Google try to tie the whole thing too tightly to Google+ and I have just got fed up with it. The old posts will stay here, but if you want to read any new ones, Please hop over to:
2 November 2014
Oars finished, just have to try them out now...
I've applied about 5 coats of linseed oil to the oars, and will probably put on many more. That s the beauty of oil.
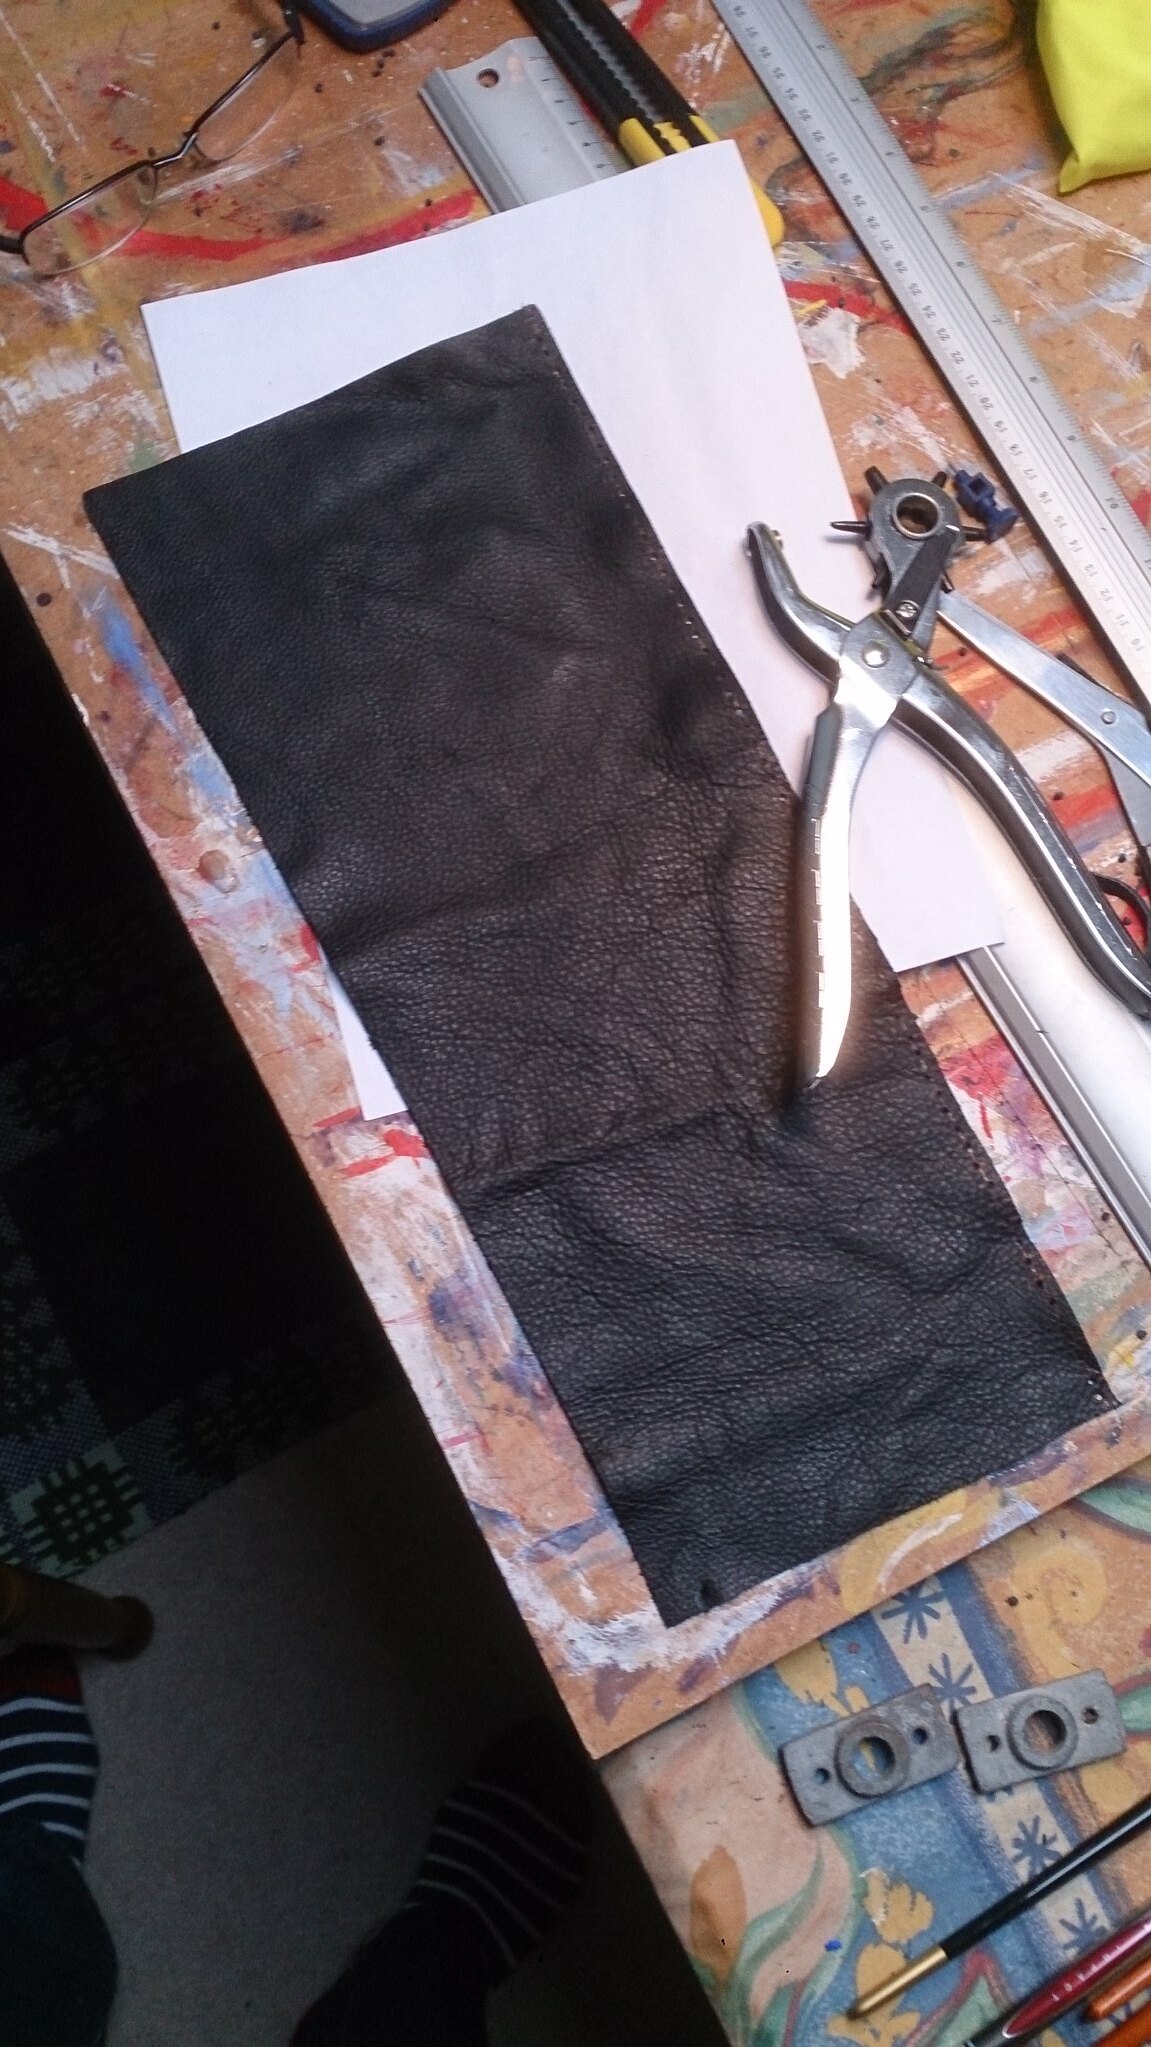 Bought two off-cuts of leather from ebay. I think they are left over upholstery bits. I also found an excellent articles on Paul Gartside's website on how to stitch oar leathers on, Very detailed and I would have made a real mess if I hadn't read it first. http://www.gartsideboats.com/faq/oar-leathers.html
 Cutting the leather is slightly tricky, but it stretched nicely to fit. I didn't wet it as it was very soft already. Each leather needed about 50 holes punched on each long edge. These need to be done fairly carefully so that they match.
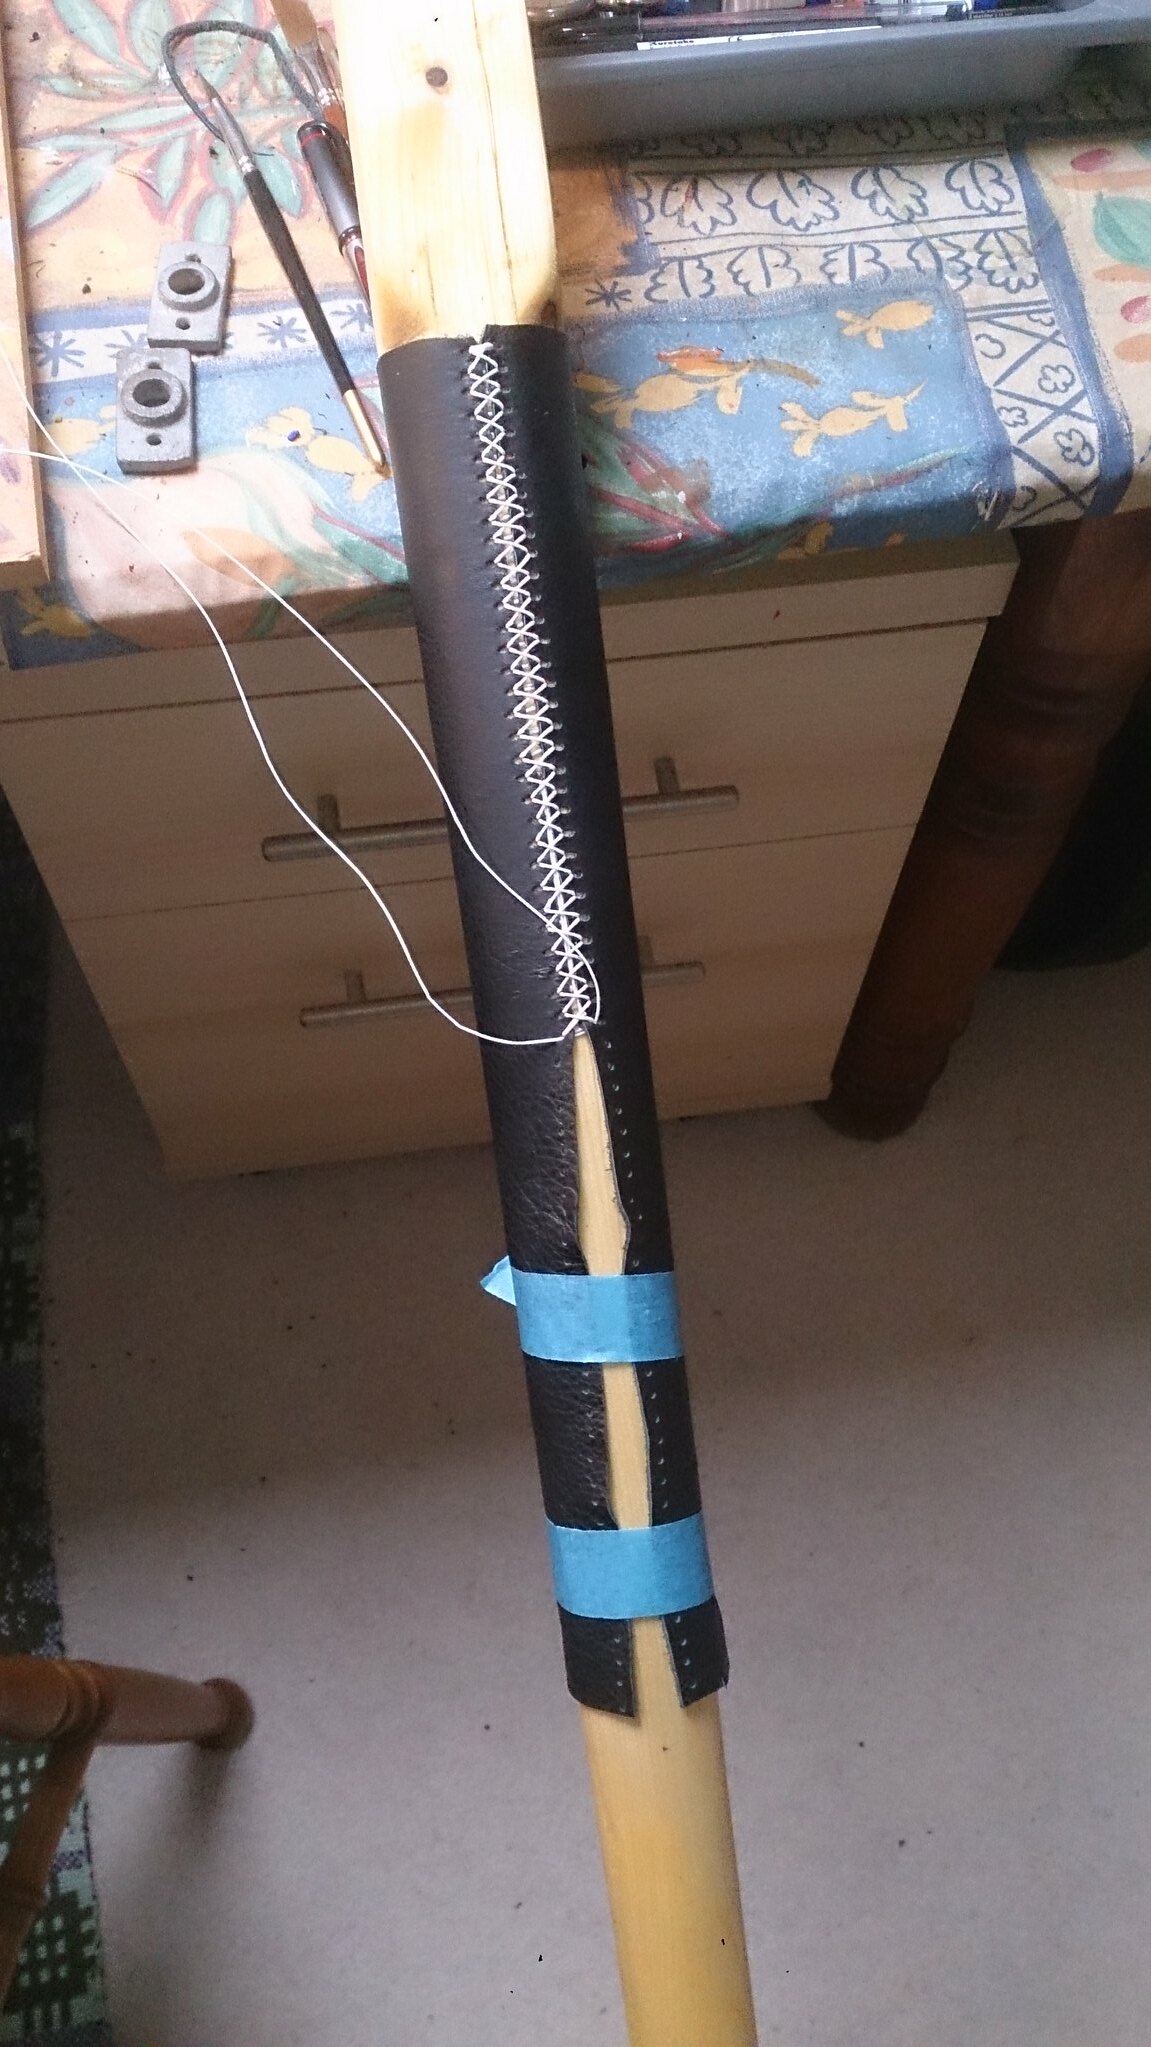 Stitching is with waxed whipping twine and two sail makers needles. I was worried the threads would pull right through the leather, but that never happened.
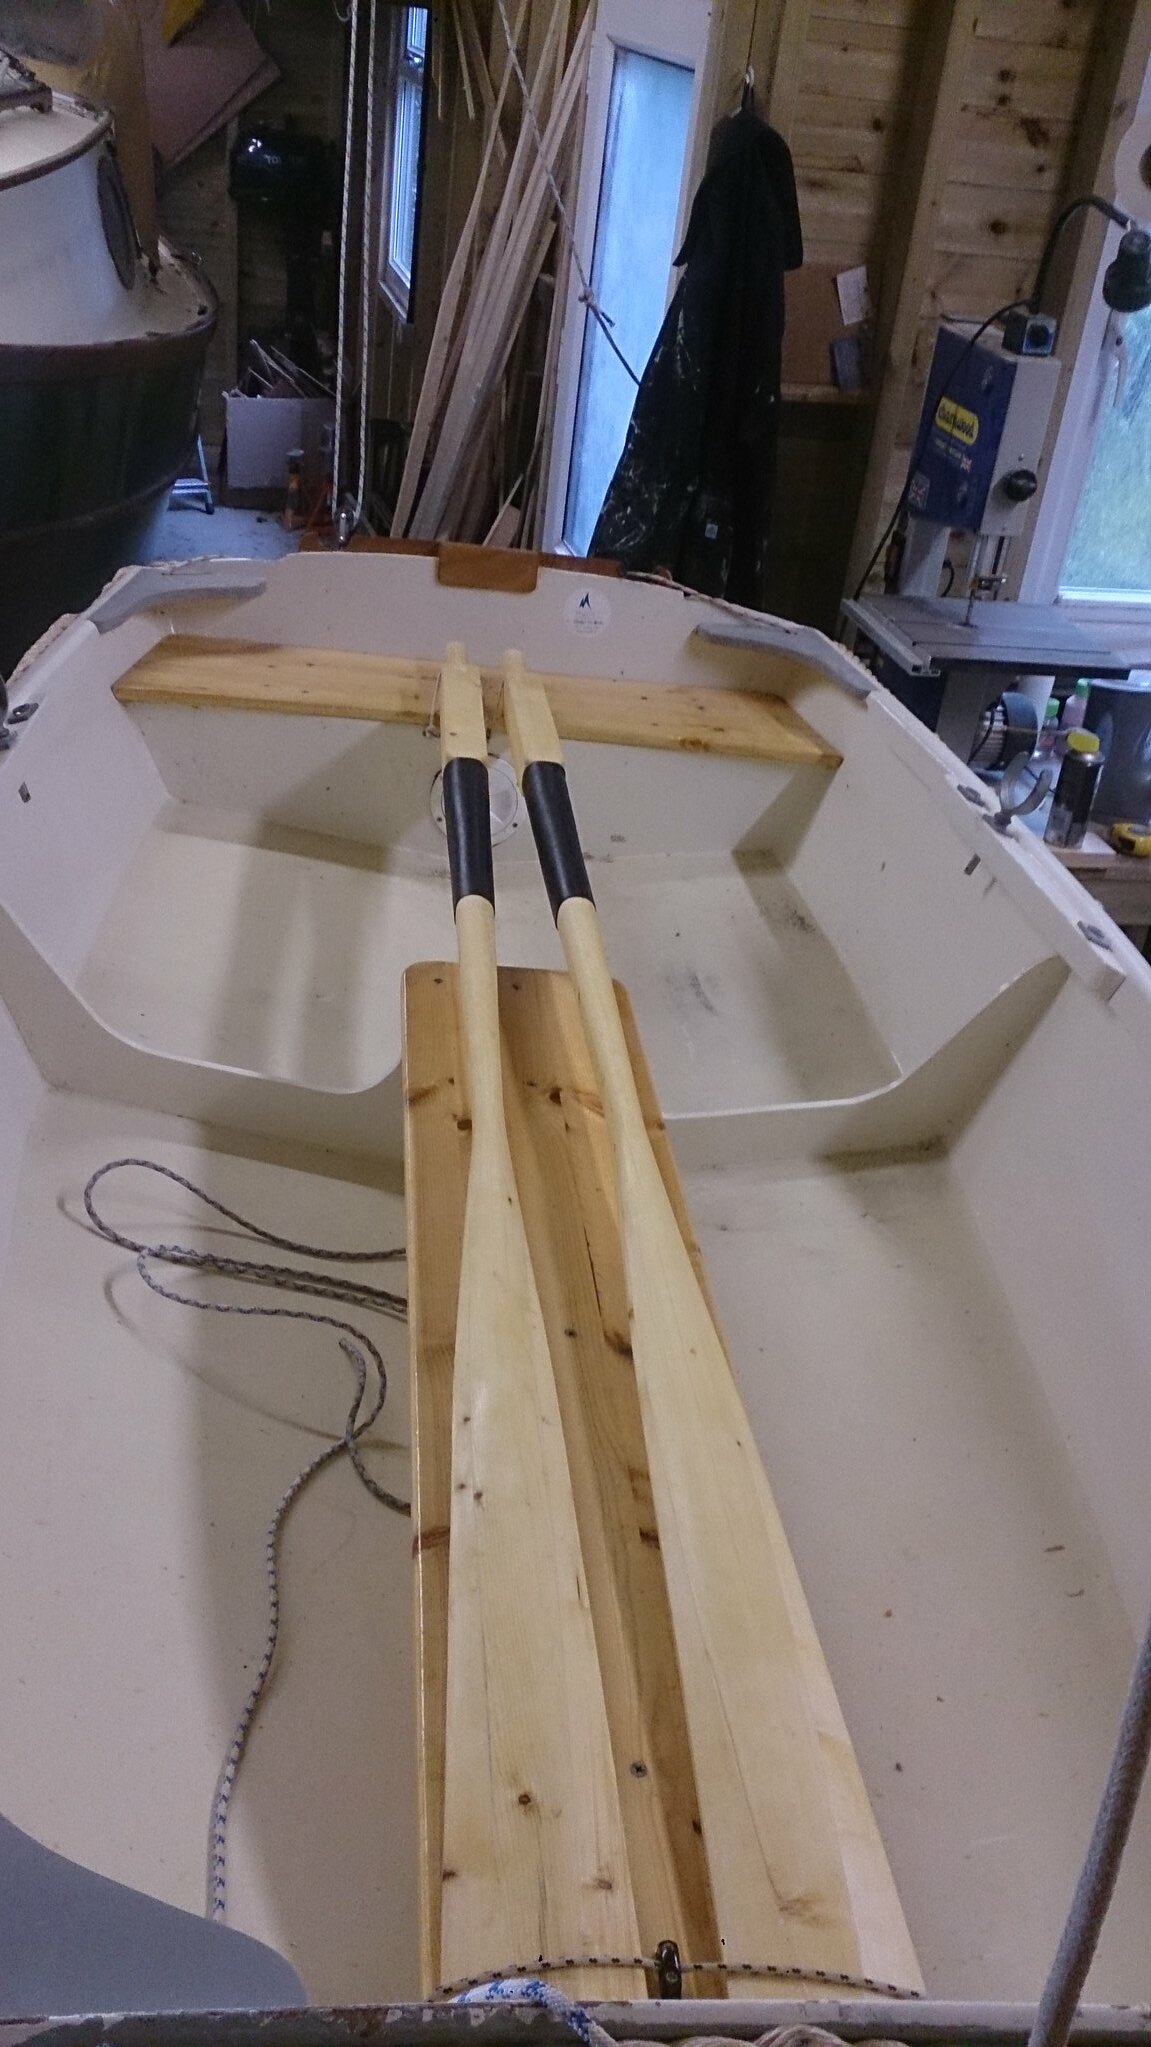 The oars fit in the boat nicely and I have made an arrangement of loops and bungies that I hope will hold them in place when towing
20 October 2014
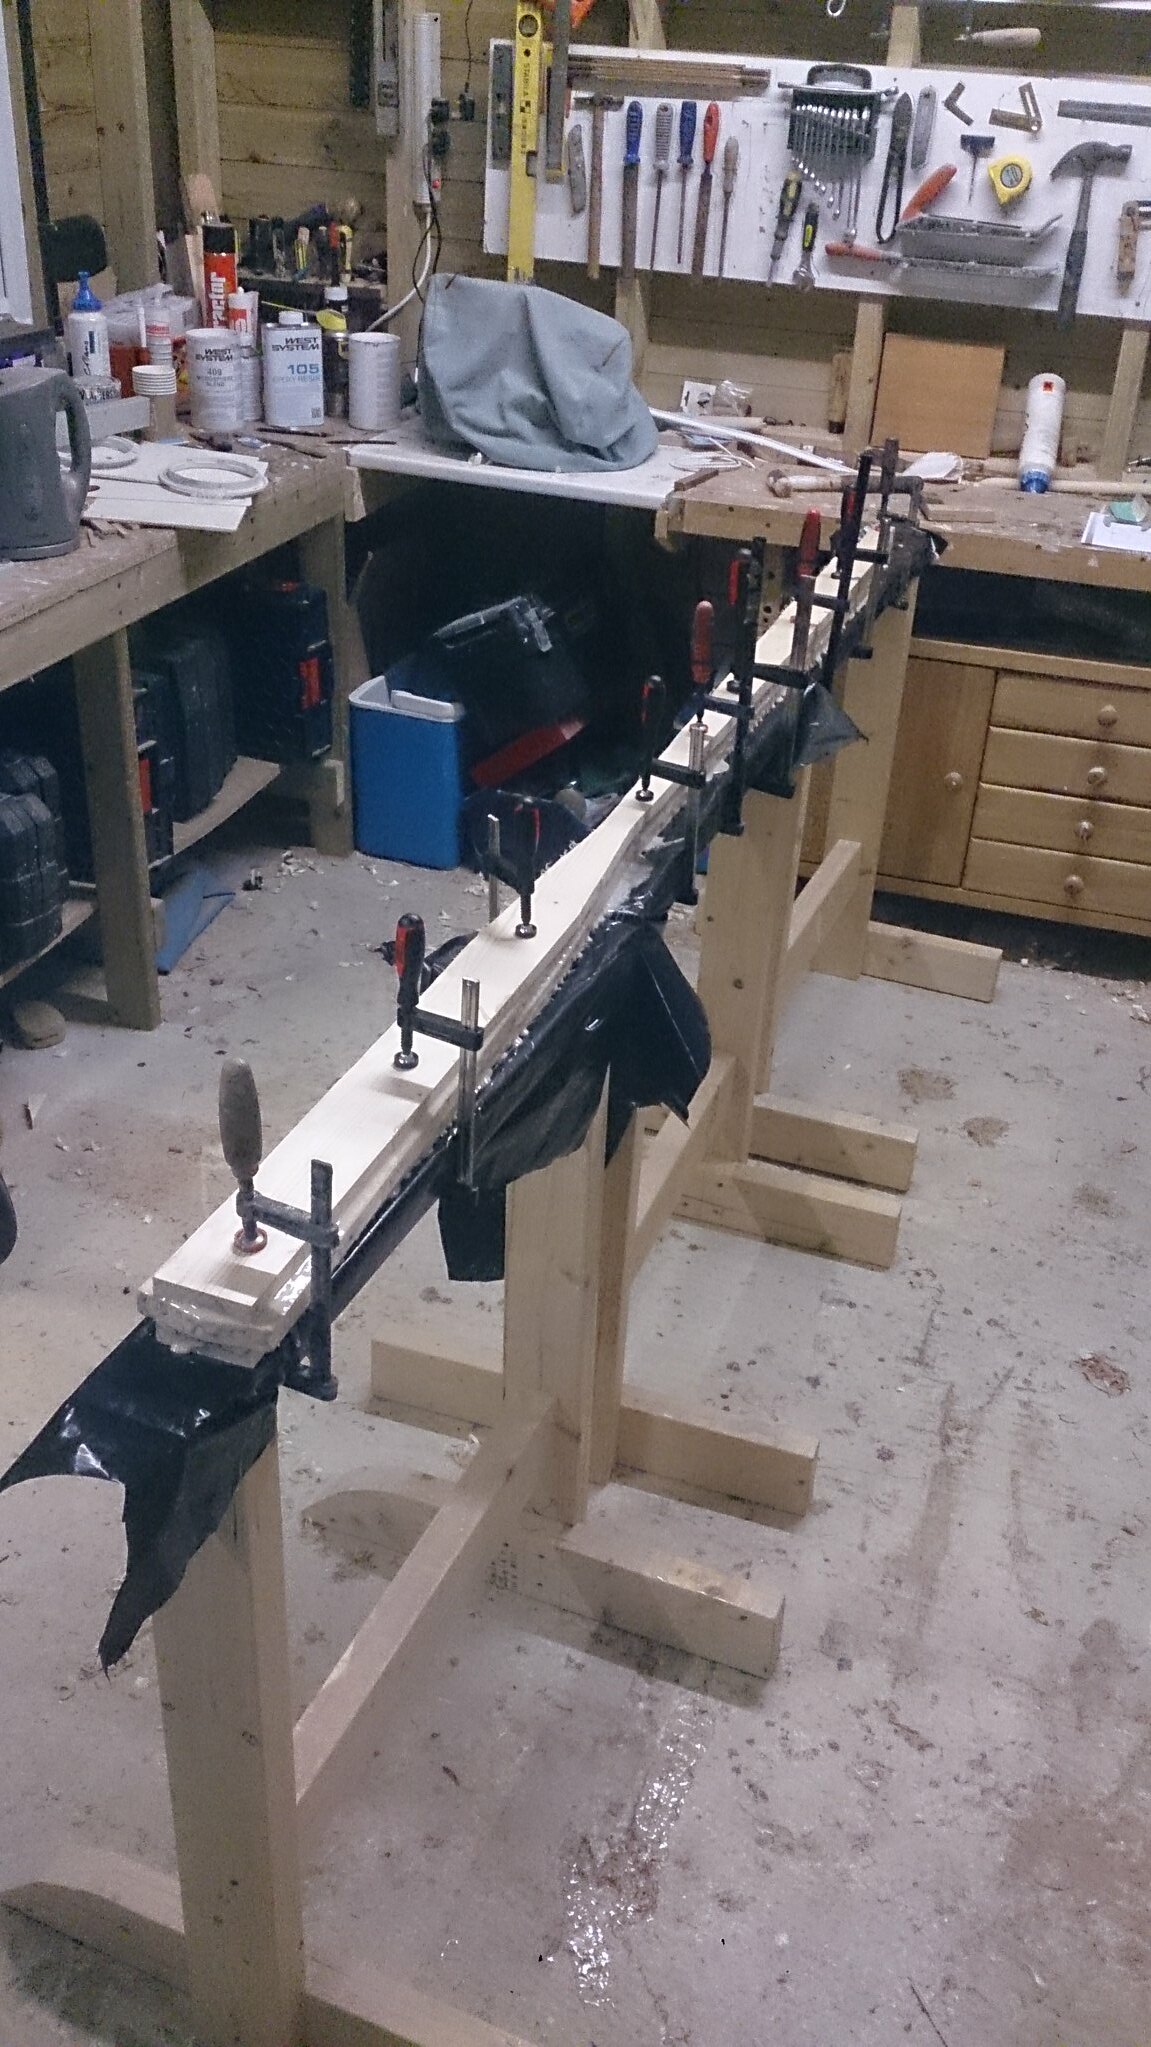
Both oars largely complete

Planing them to match was much easier than I expected. By laying the finished one alongside the one I was working on, I could continuously compare them visually, and using a cheap vernier calliper, I just compared thicknesses at any position along them. I still haven't managed to hollow out the blades either side of the central ridge. I bought a convex base spokeshave and it is one of the worse tools I have wasted money on. The curve of the blade doesn't match the curve of the base. The chip breaker doesn't fit properly, even after regrinding, and the blade was blunt. I couldn't get a single decent shaving off with it. I am planning to get some coarse sandpaper and a large diameter dowel, and have a go with that, but they will work as they stand. I still need to get some leather for each.
12 October 2014
First oar largely finished and second under way


9 October 2014
New oars


7 October 2014
First coat of paint on the patched deck
30 September 2014
Repairs and changes ongoing.

21 September 2014
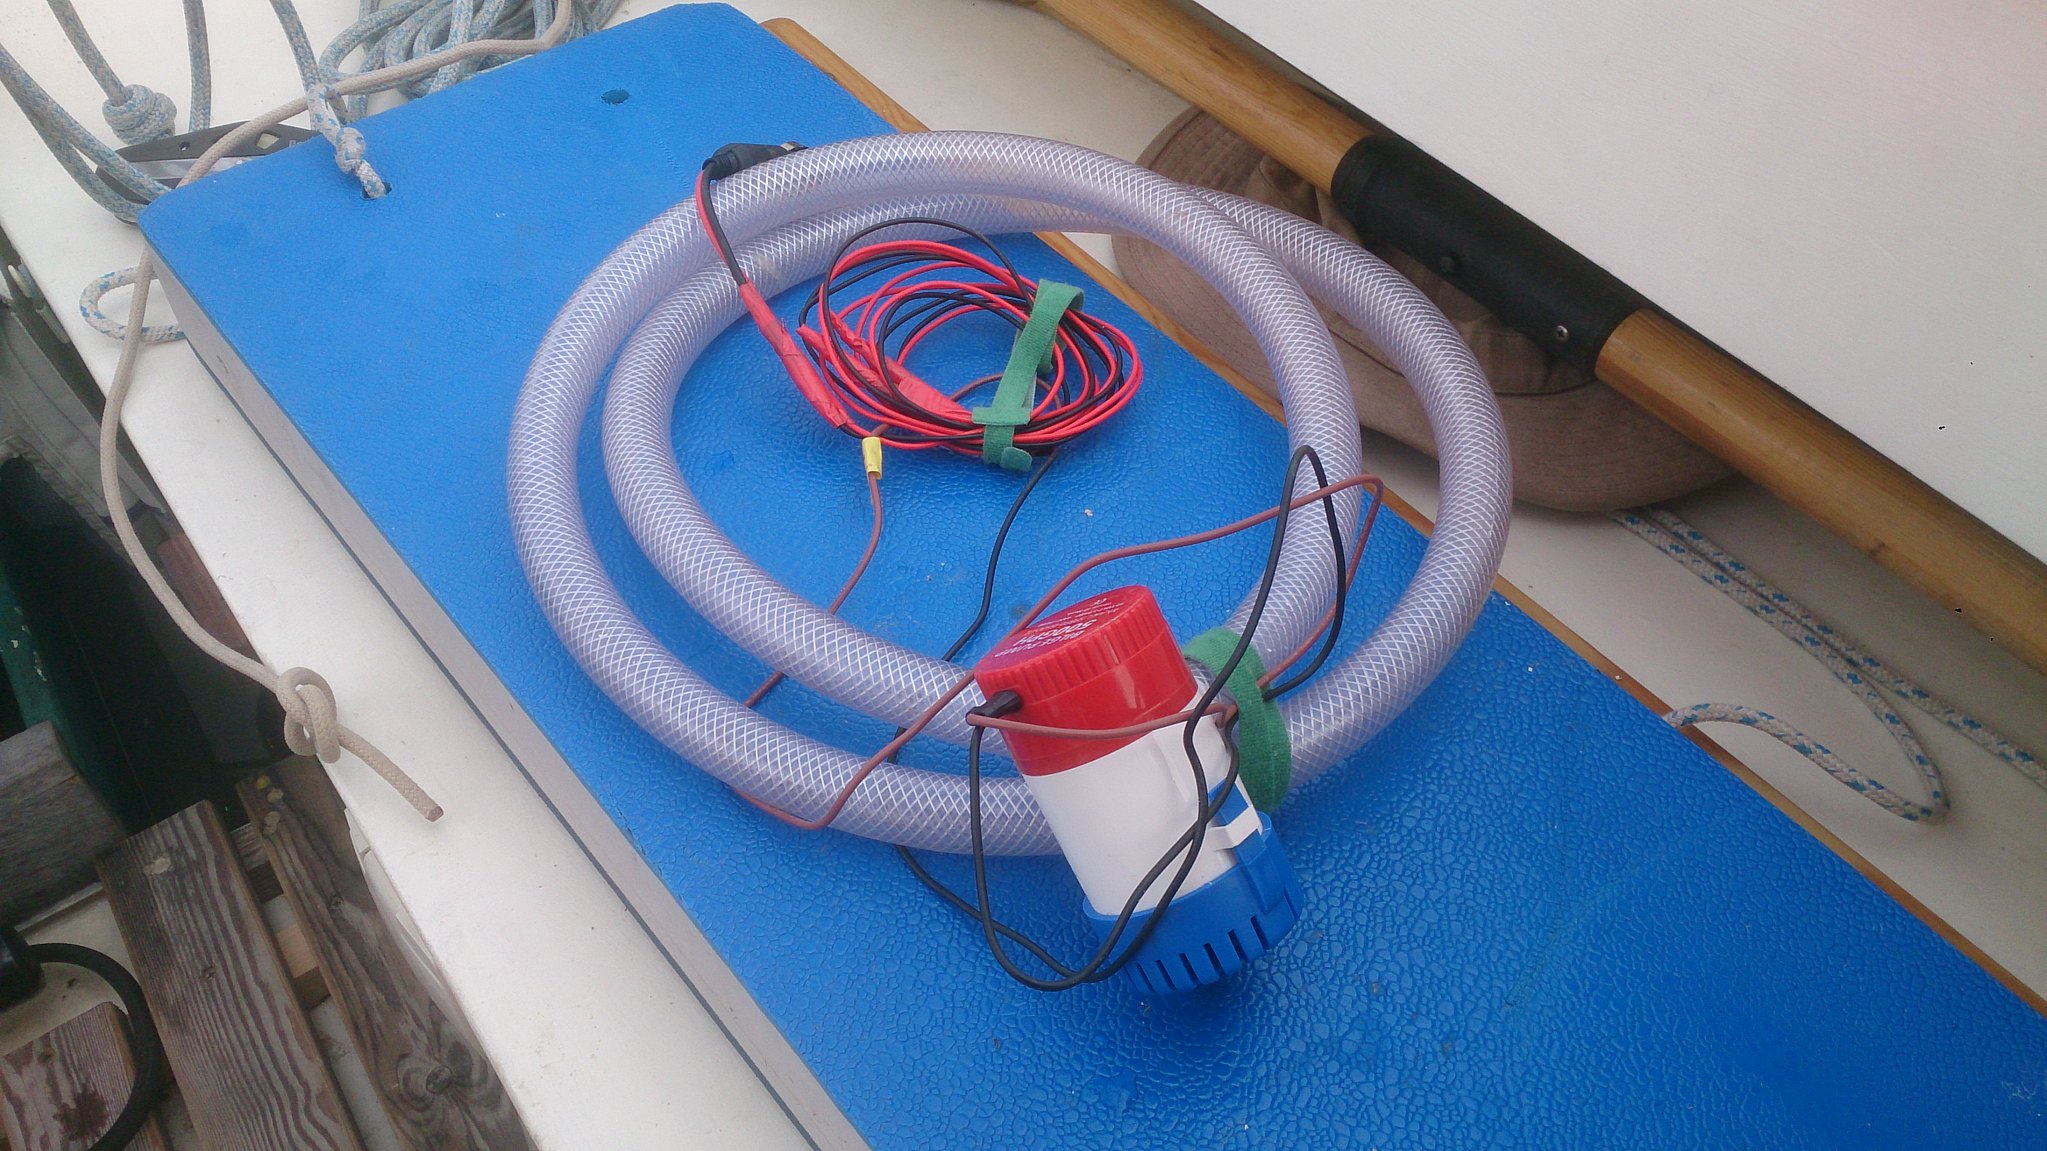
Fitting deck glands
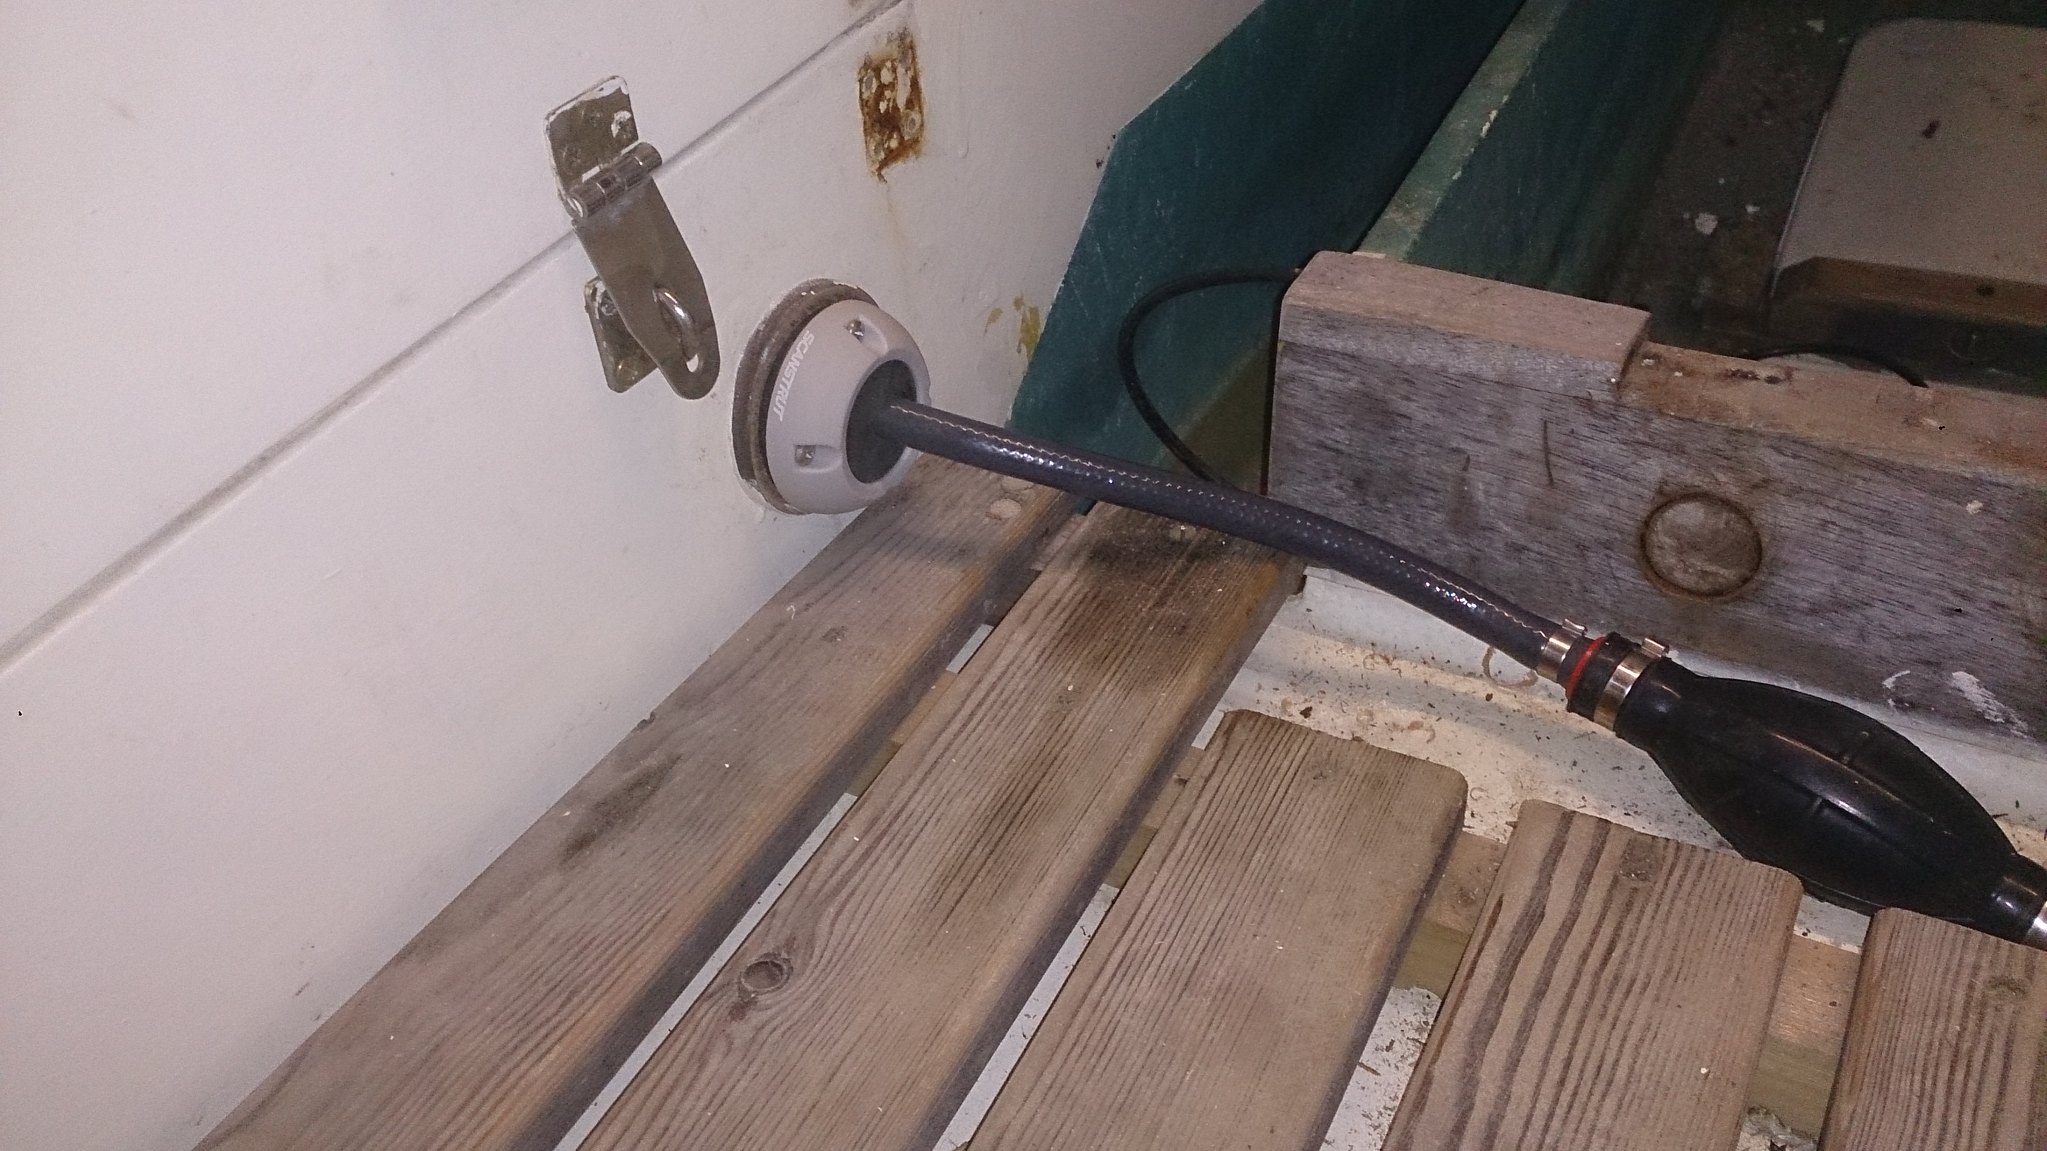
I am going to reroute the depth sounder cable to the opposite side of the boat. I can take it directly into the end of the quarter berth, through another deck gland, and then through trunking to the display unit. This means no unsealed holes into the cabin, which is how it is routed at present.
18 September 2014
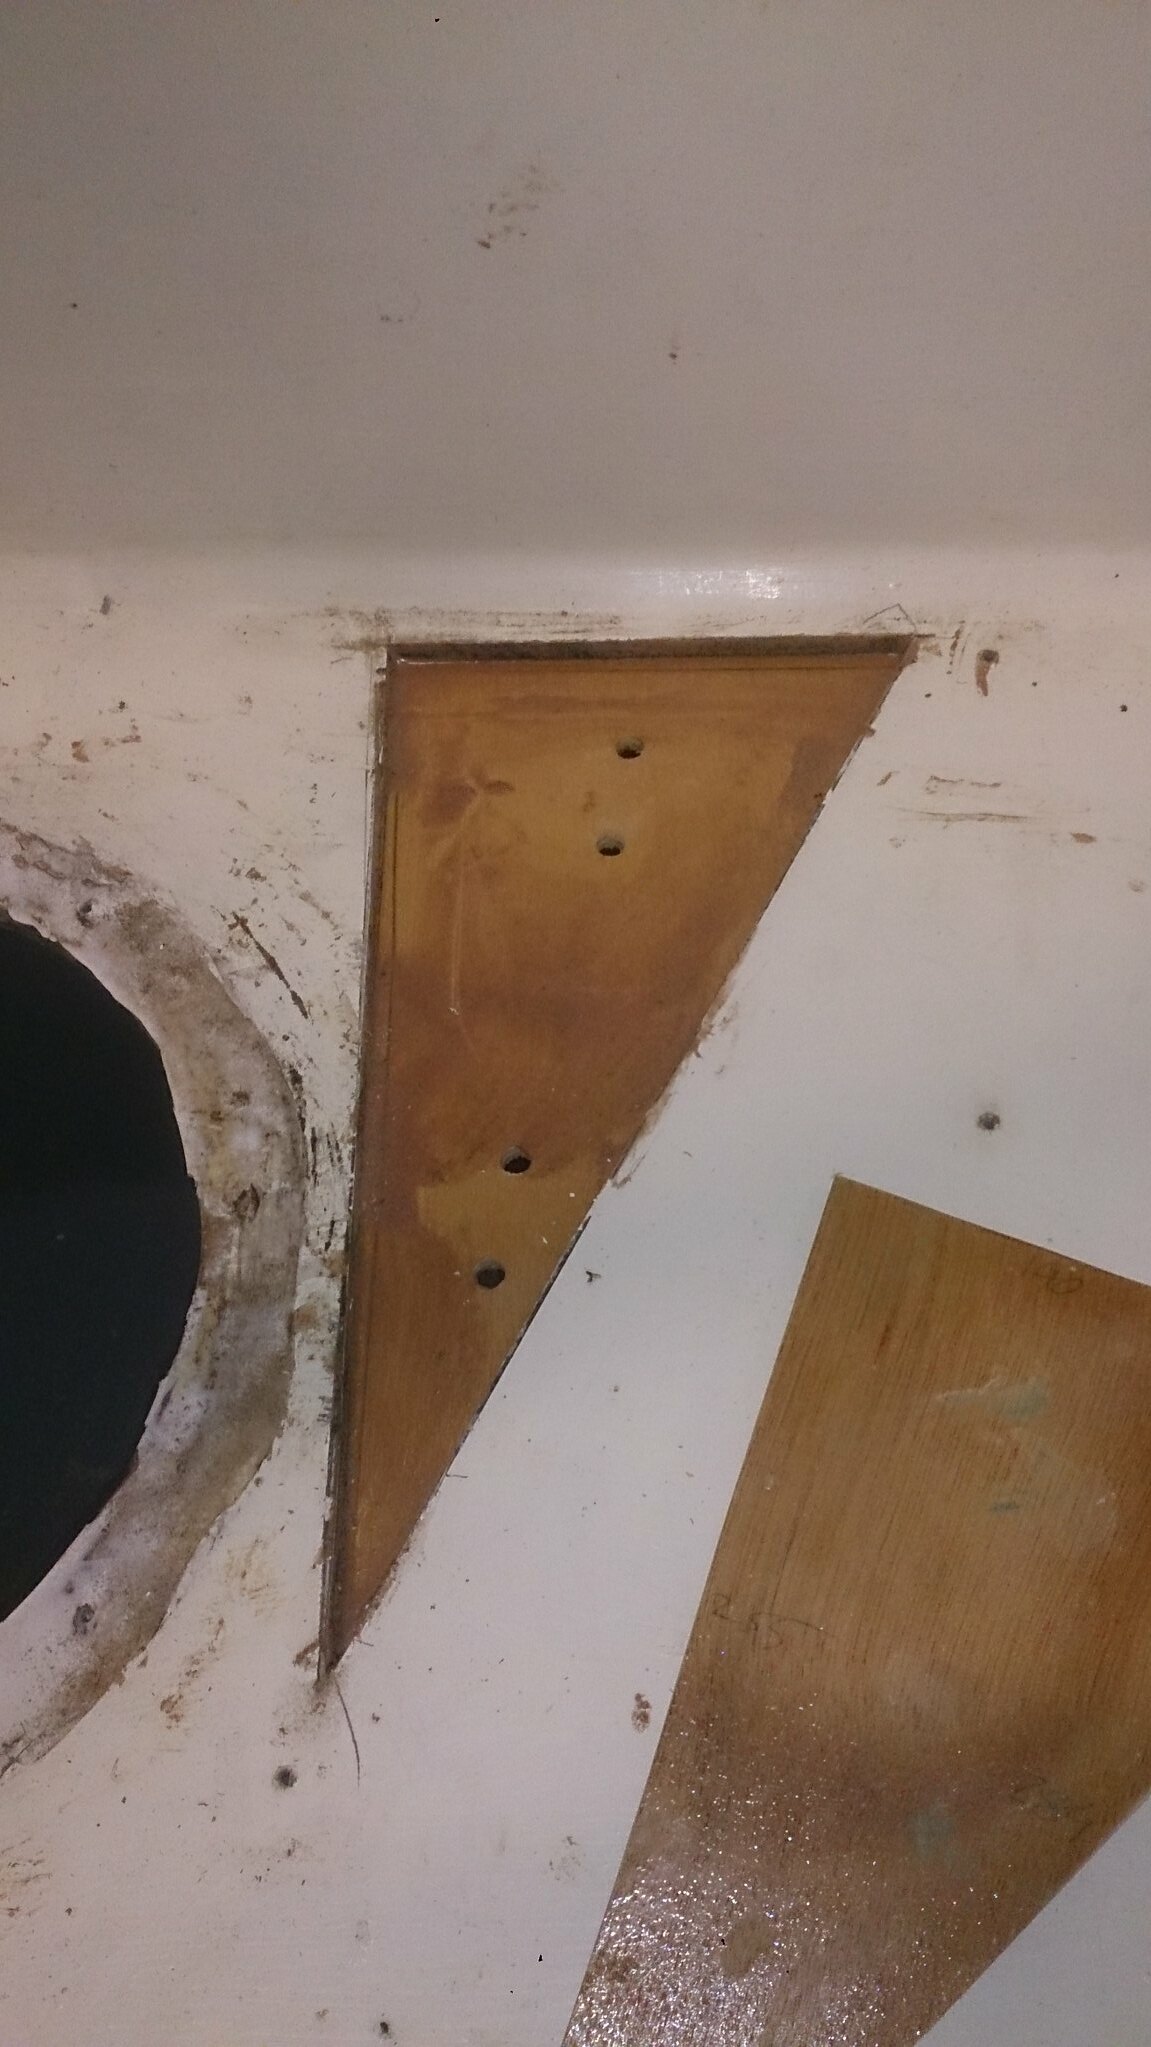
Re-doing deck repair

16 September 2014
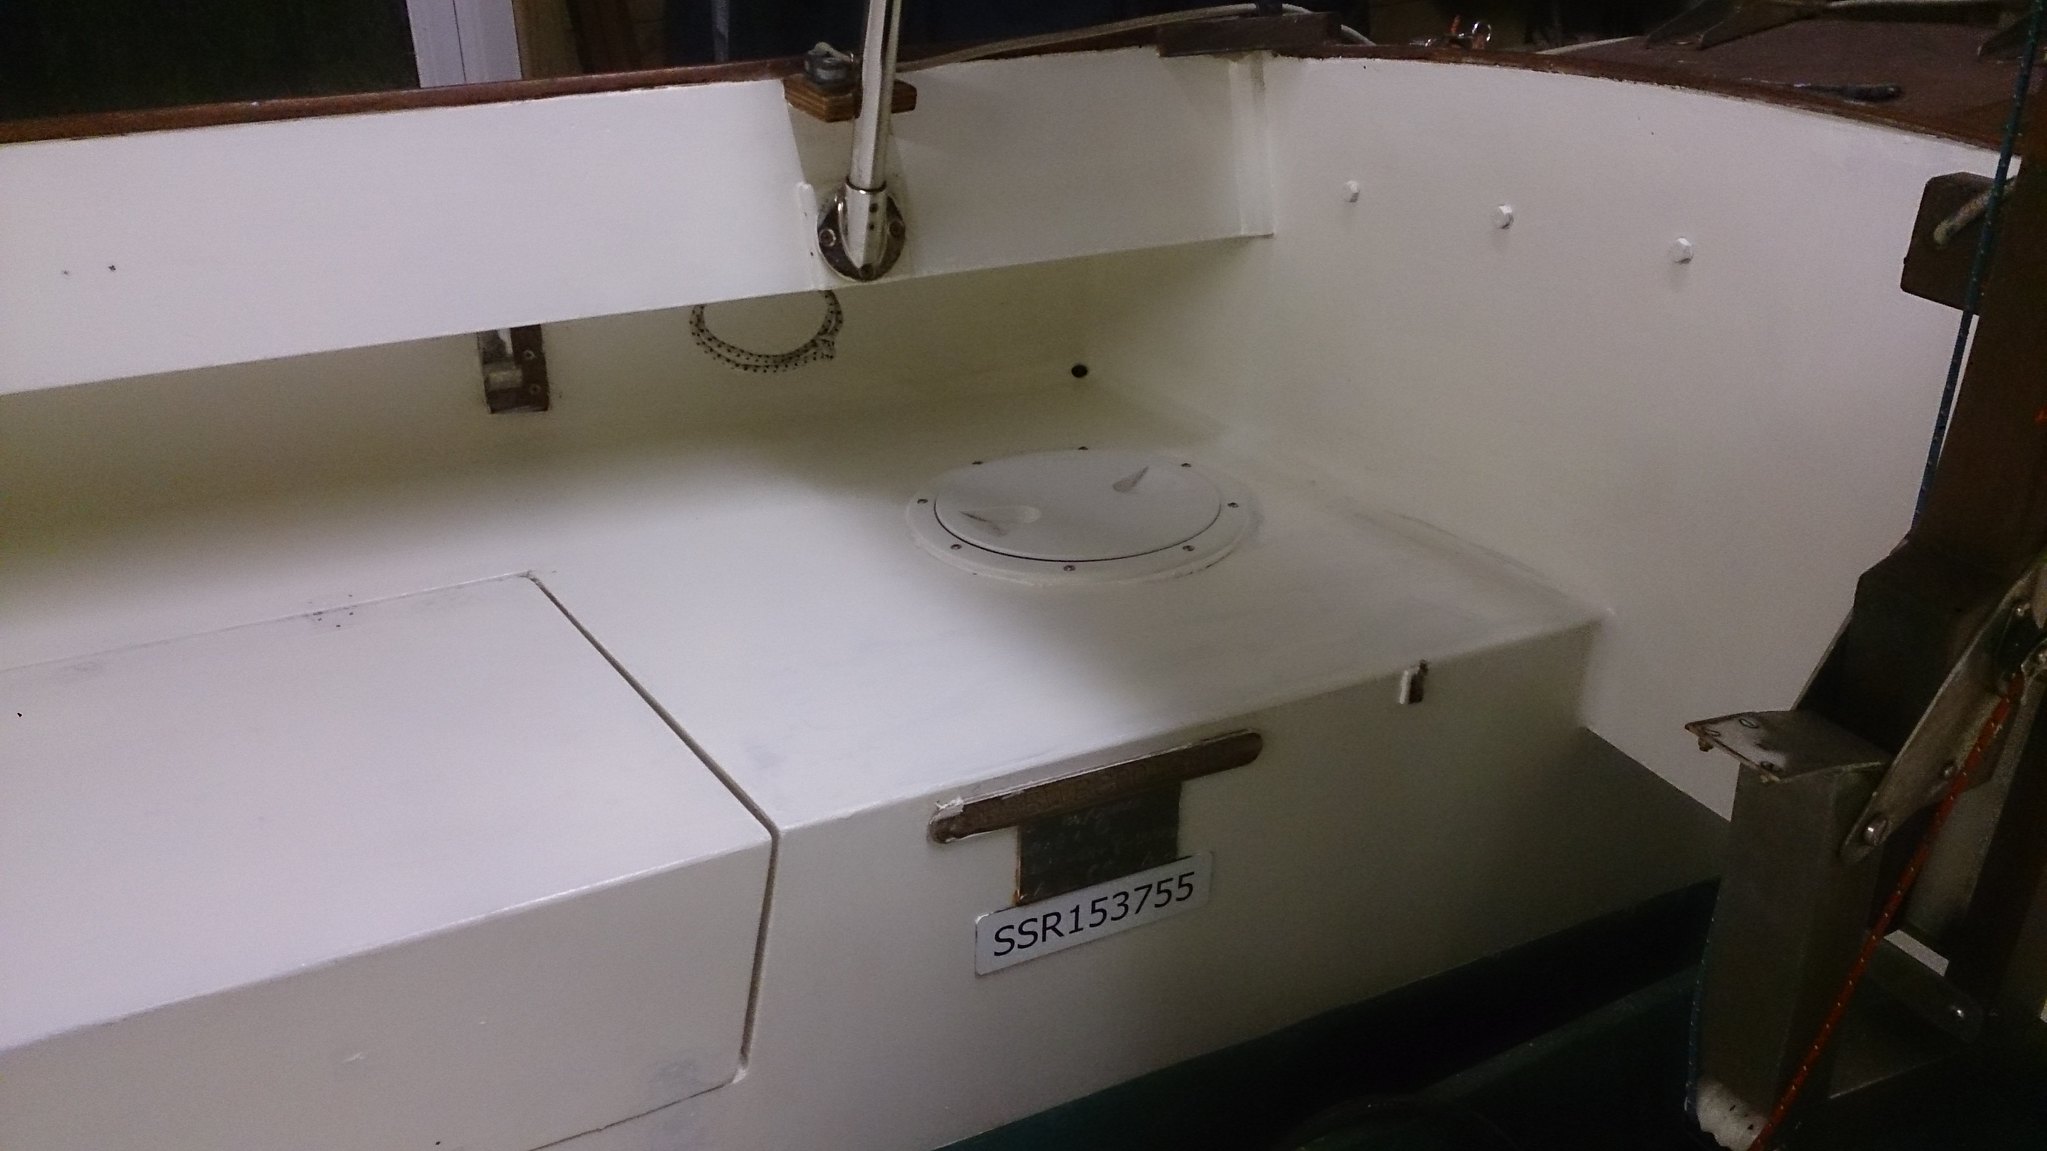
Outboard well blanking plate.
The blanking plate works well, and with four crew on board it is essential to fit it. Otherwise far too much water sloshes up into the cockpit and the self bailers in the sumps can't empty it quickly enough. Fitting the plate under way was very difficult. The space under the outboard is cramped and awkward to get at. The force of up welling water pushes the board out of the way until you can finally twist the locking bar in place. I have modified the set up.
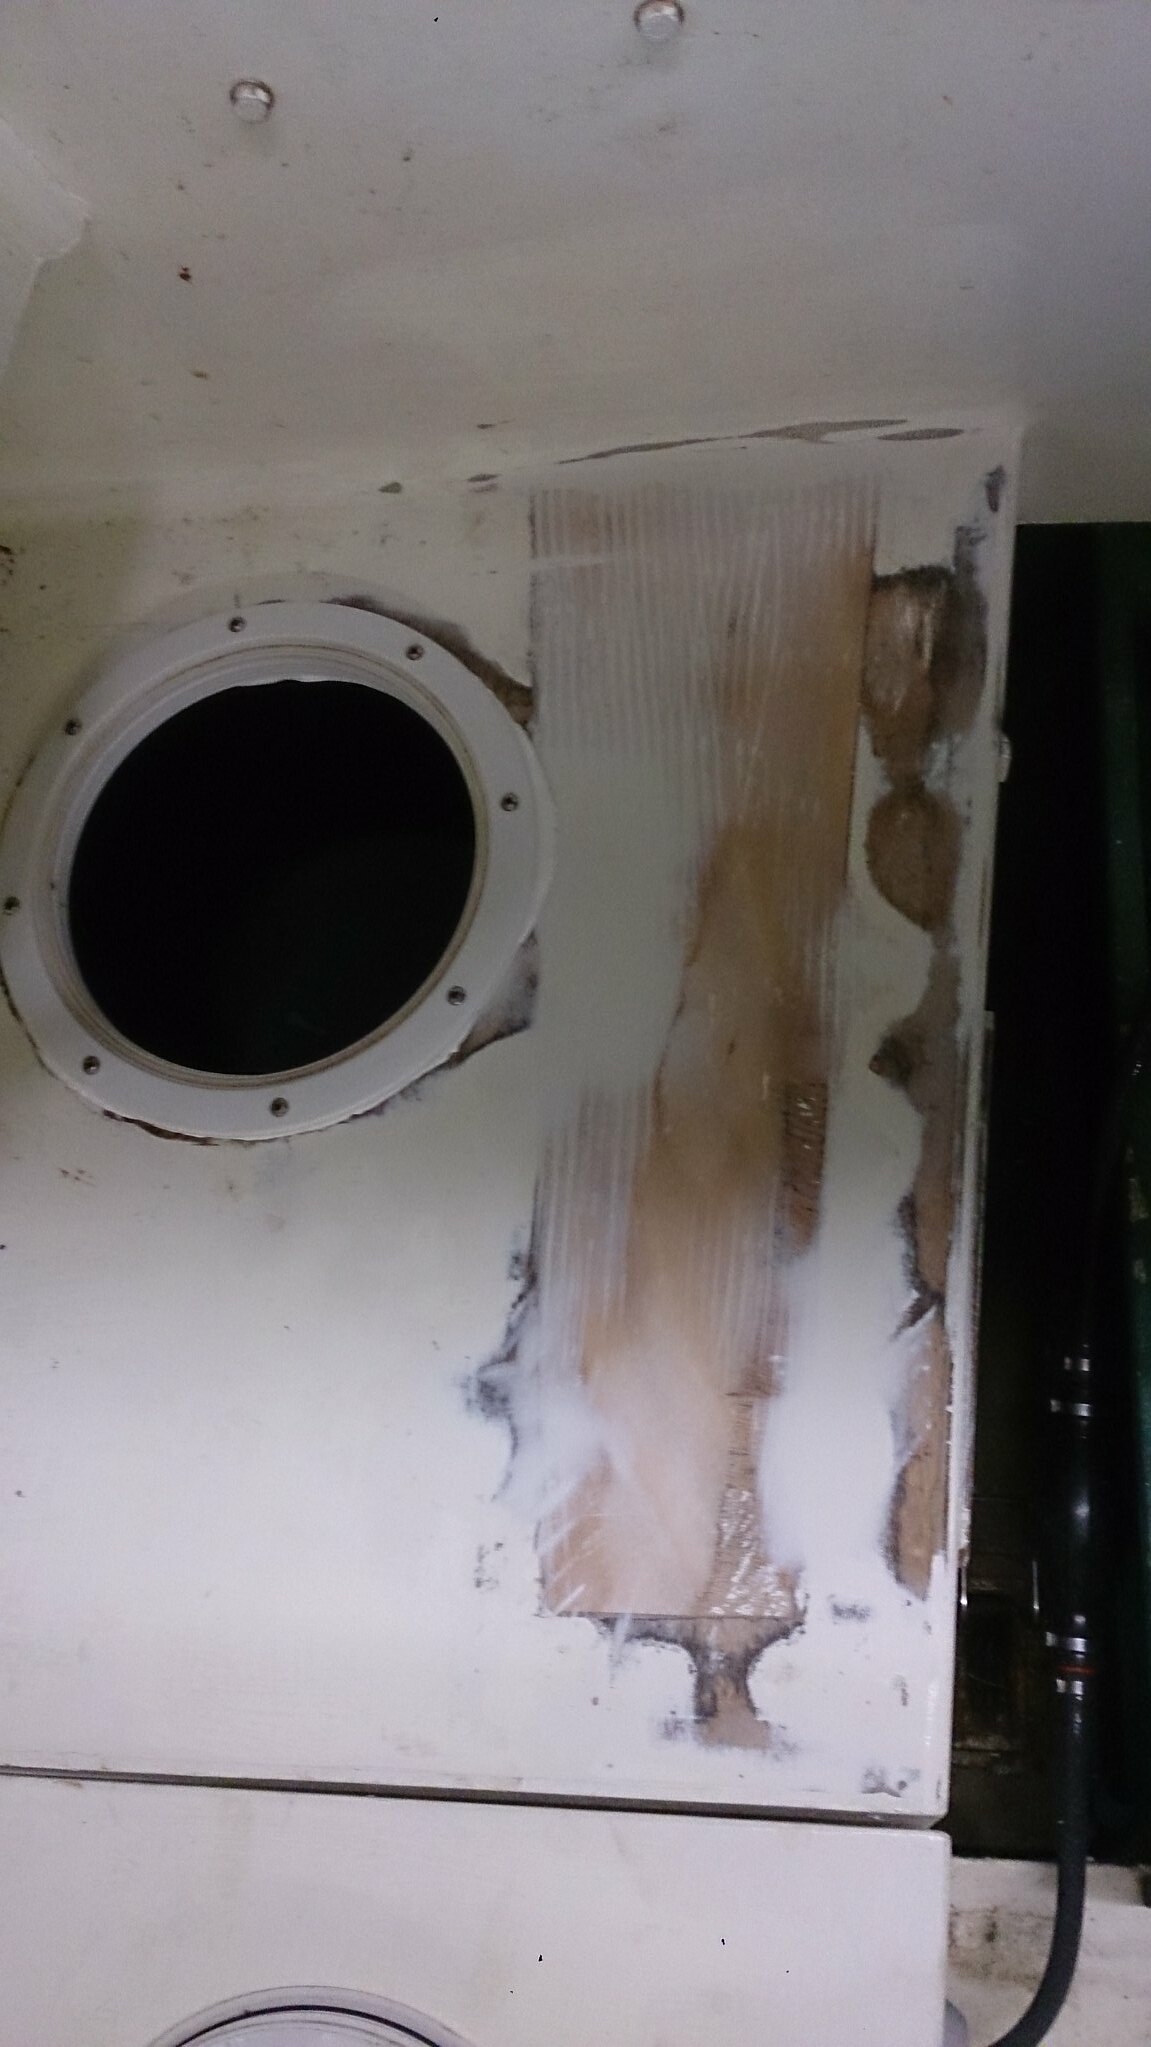
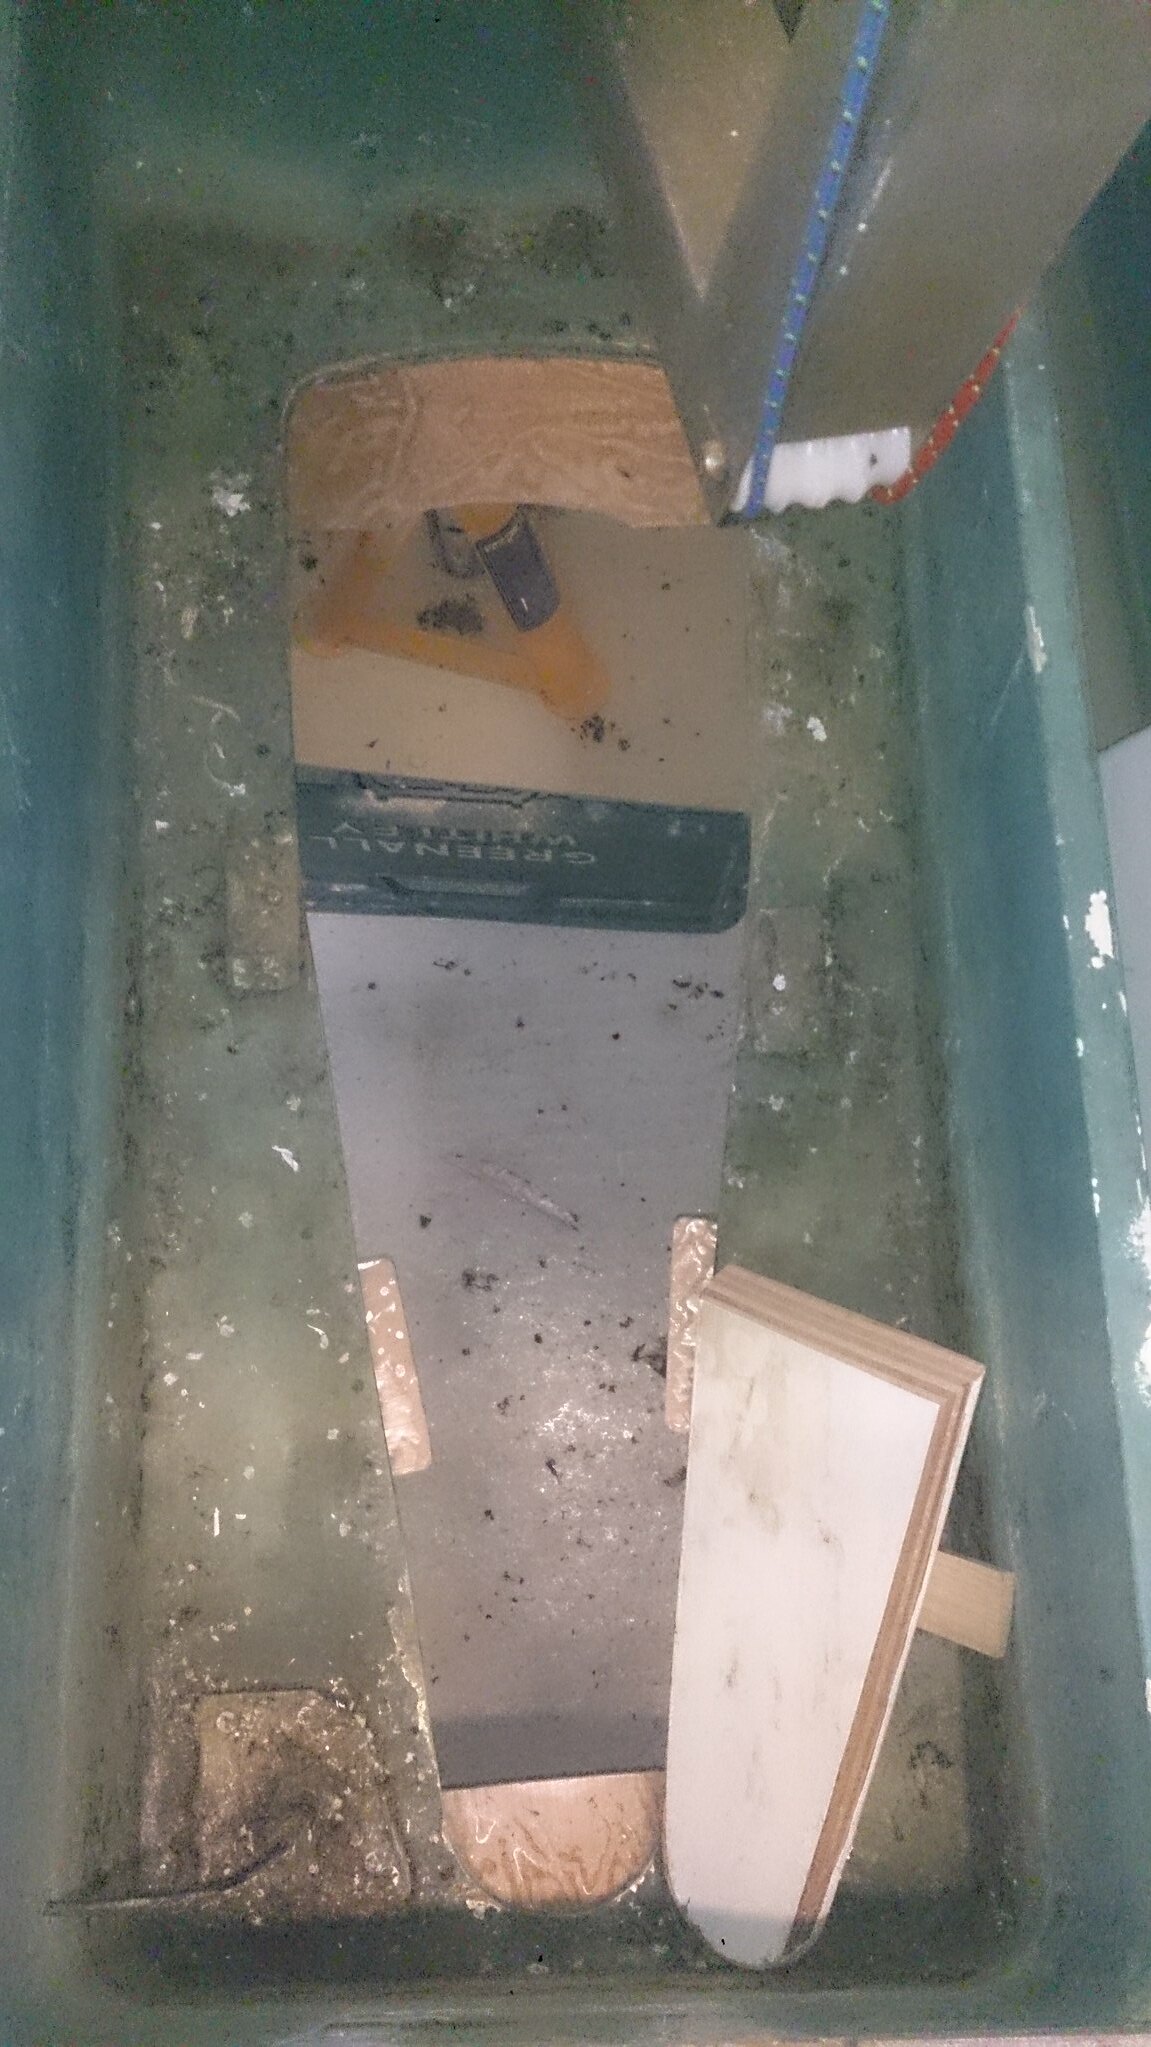 First, I have enlarged the lips at front and back of the well to support the plate. and screwed on intermediate one just aft of the outboard leg in the down position. All in epoxy coated 6mm marine ply. These will need to be anti-fouled.
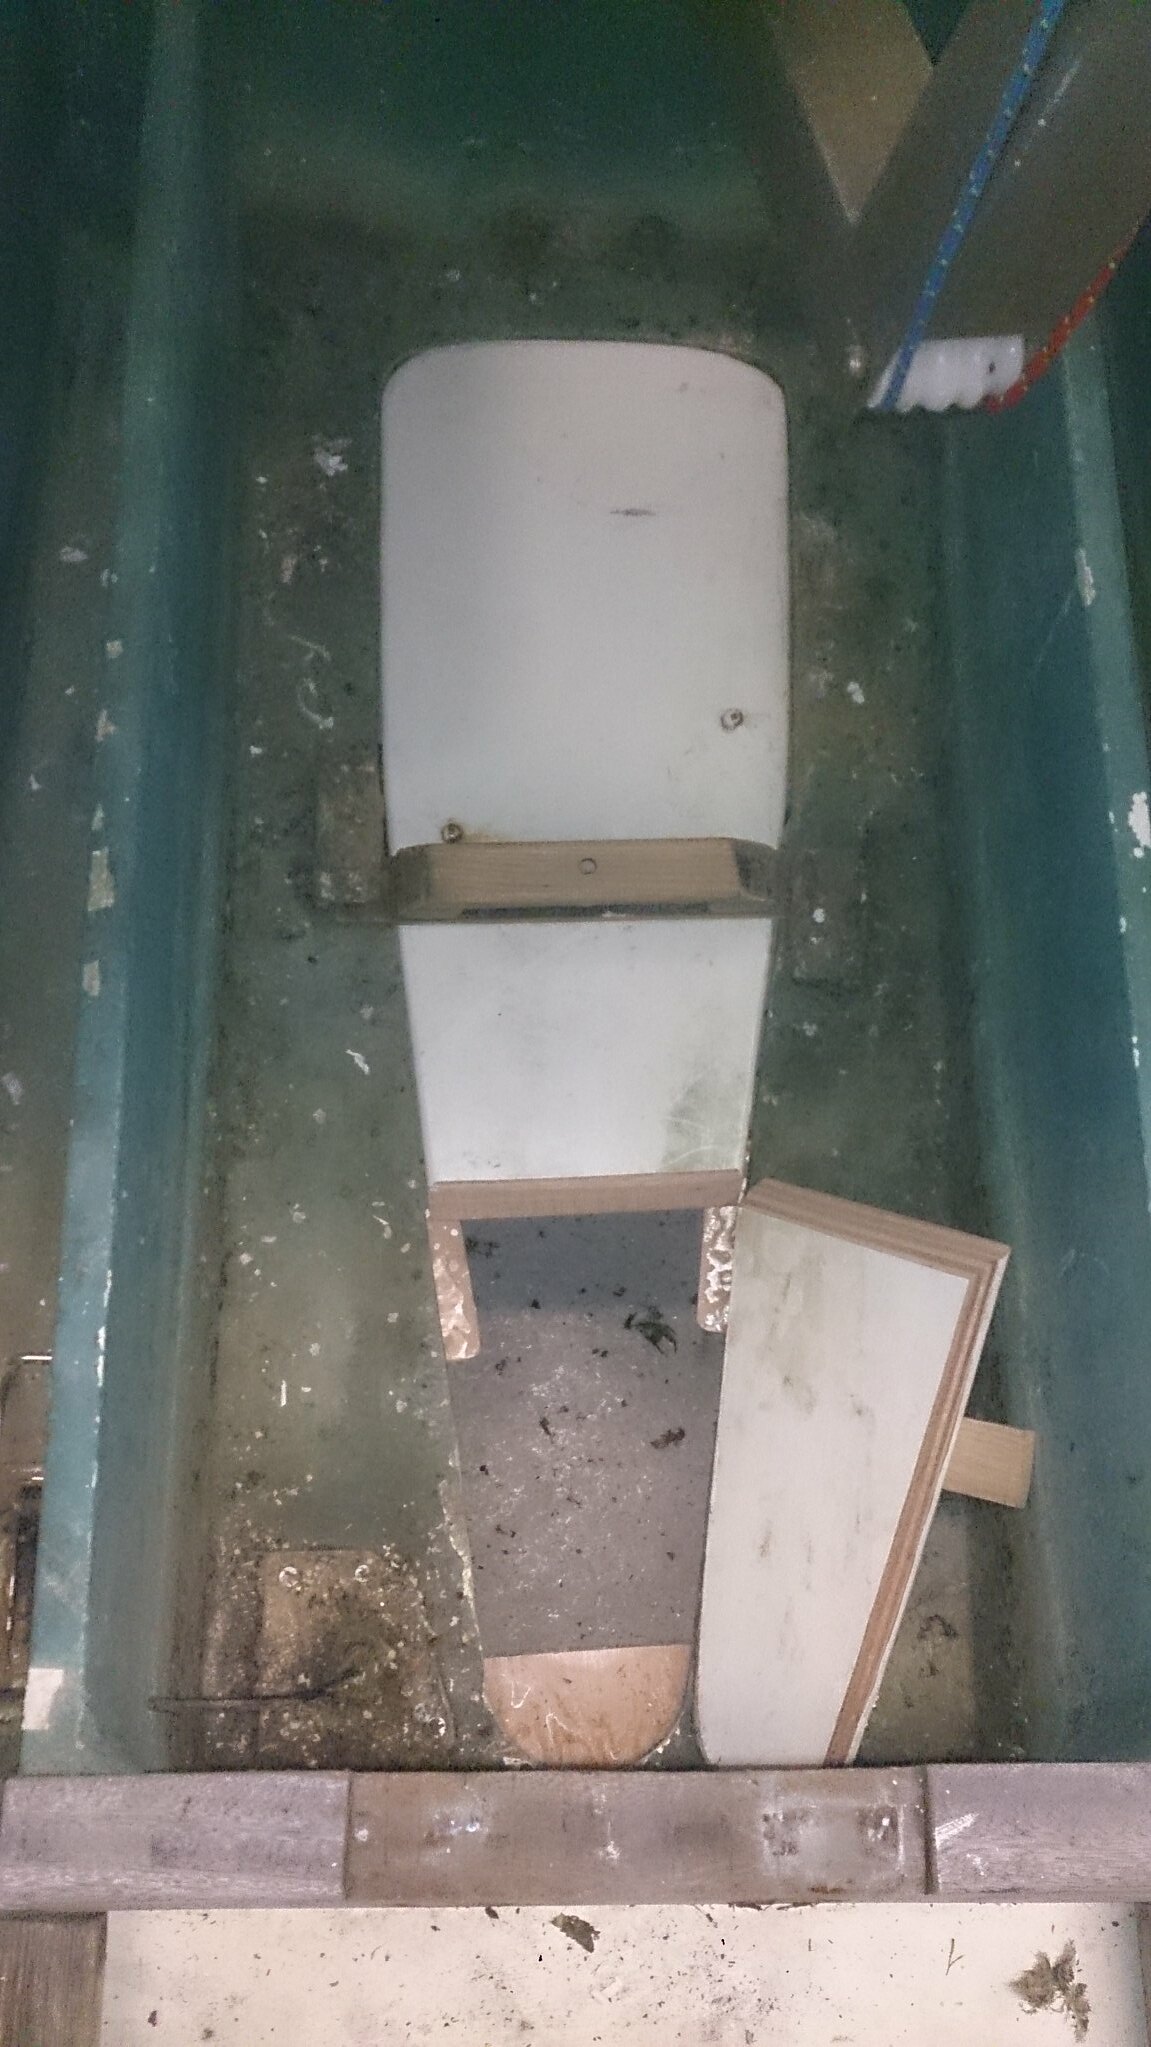 Then I sawed the plate into two parts, with a bevelled cut, so the edge of the smaller part can rest on the larger. The large part will be put in as before, and can be used when the outboard leg is down, which will be a bonus. It can also be fitted from either side. Full length it can only be fitted under the raised engine from the starboard side.
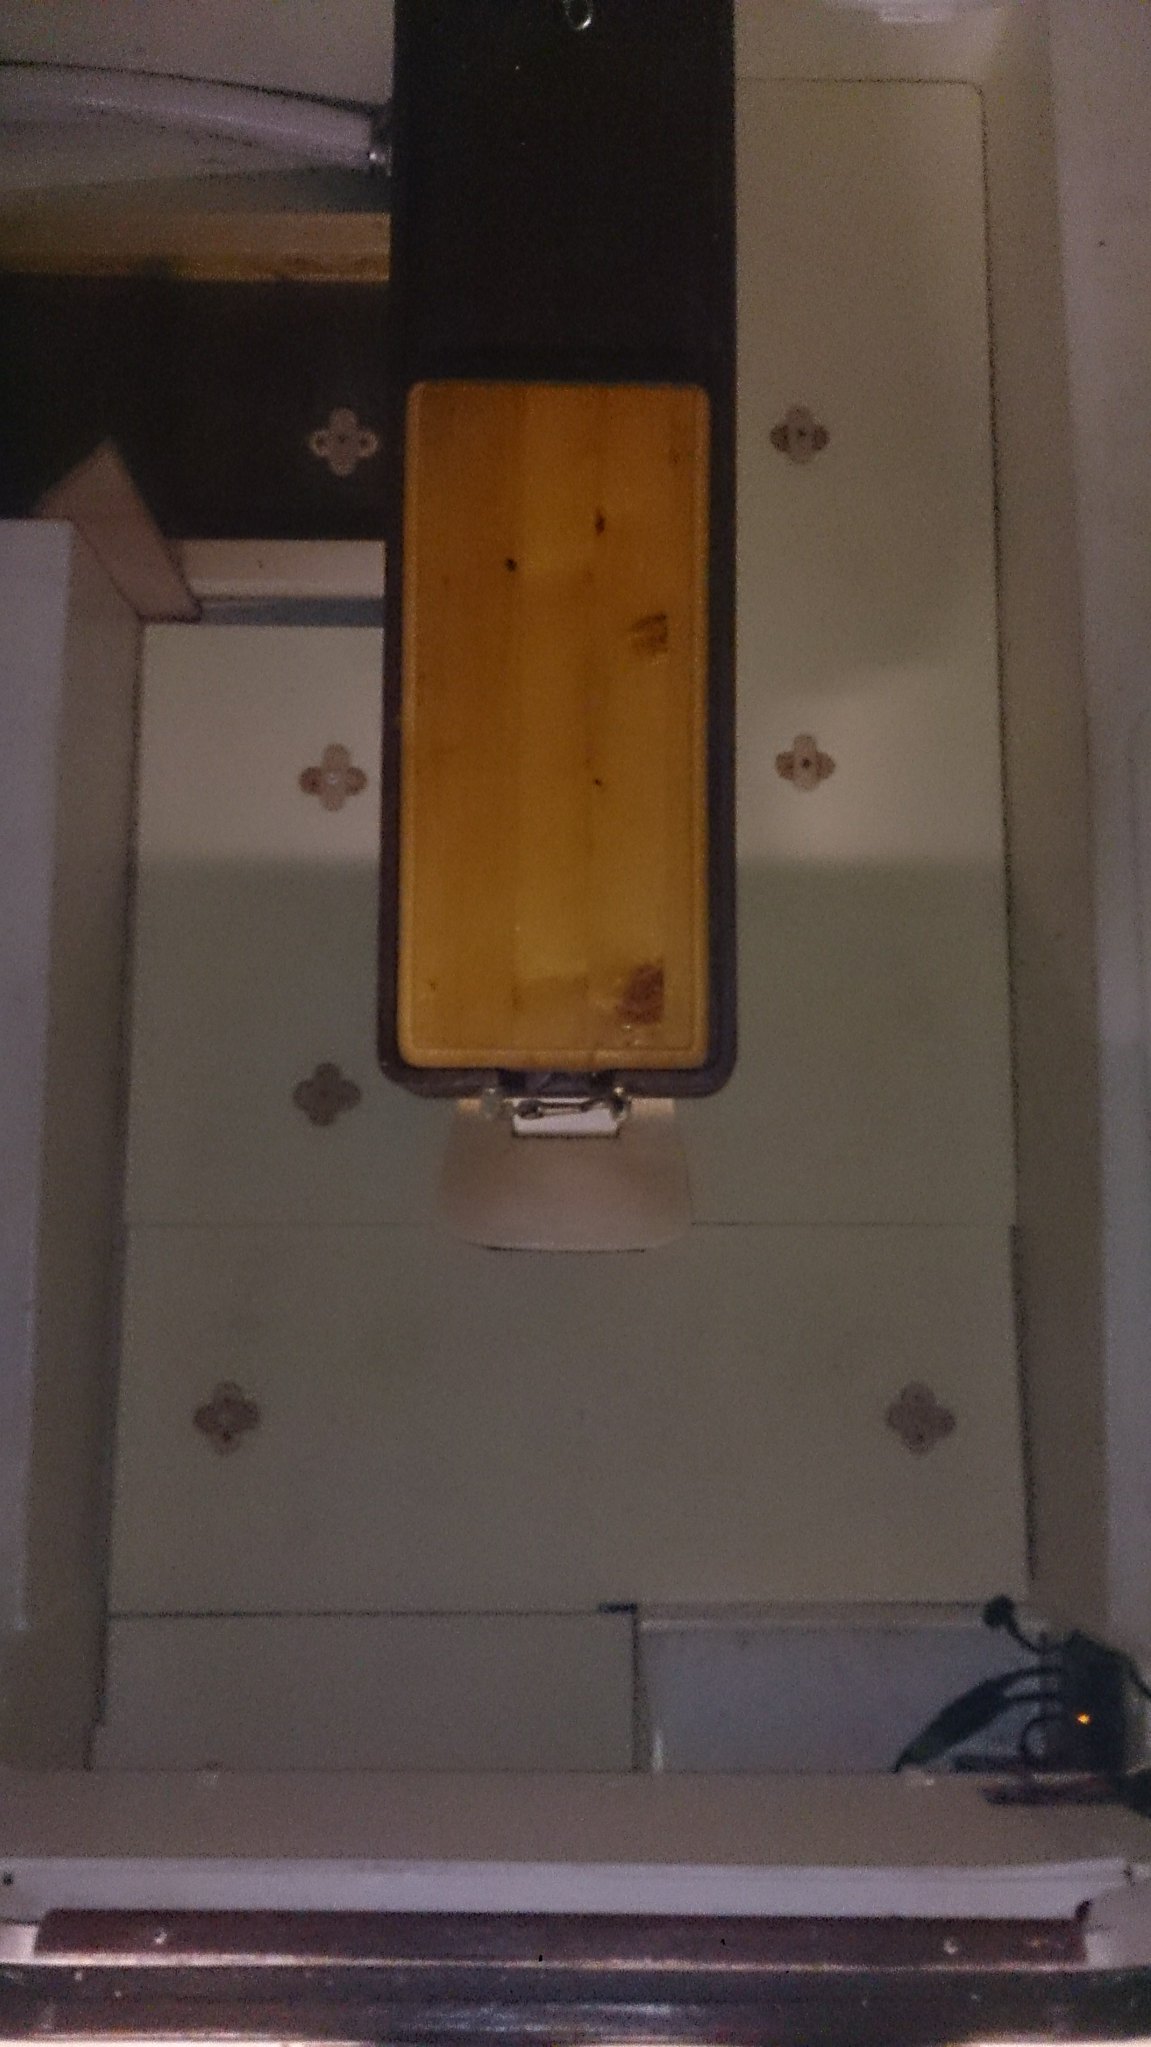
The short forward length will be hinged to the side of the opening with nylon hinges, so it can be flapped down when needed.
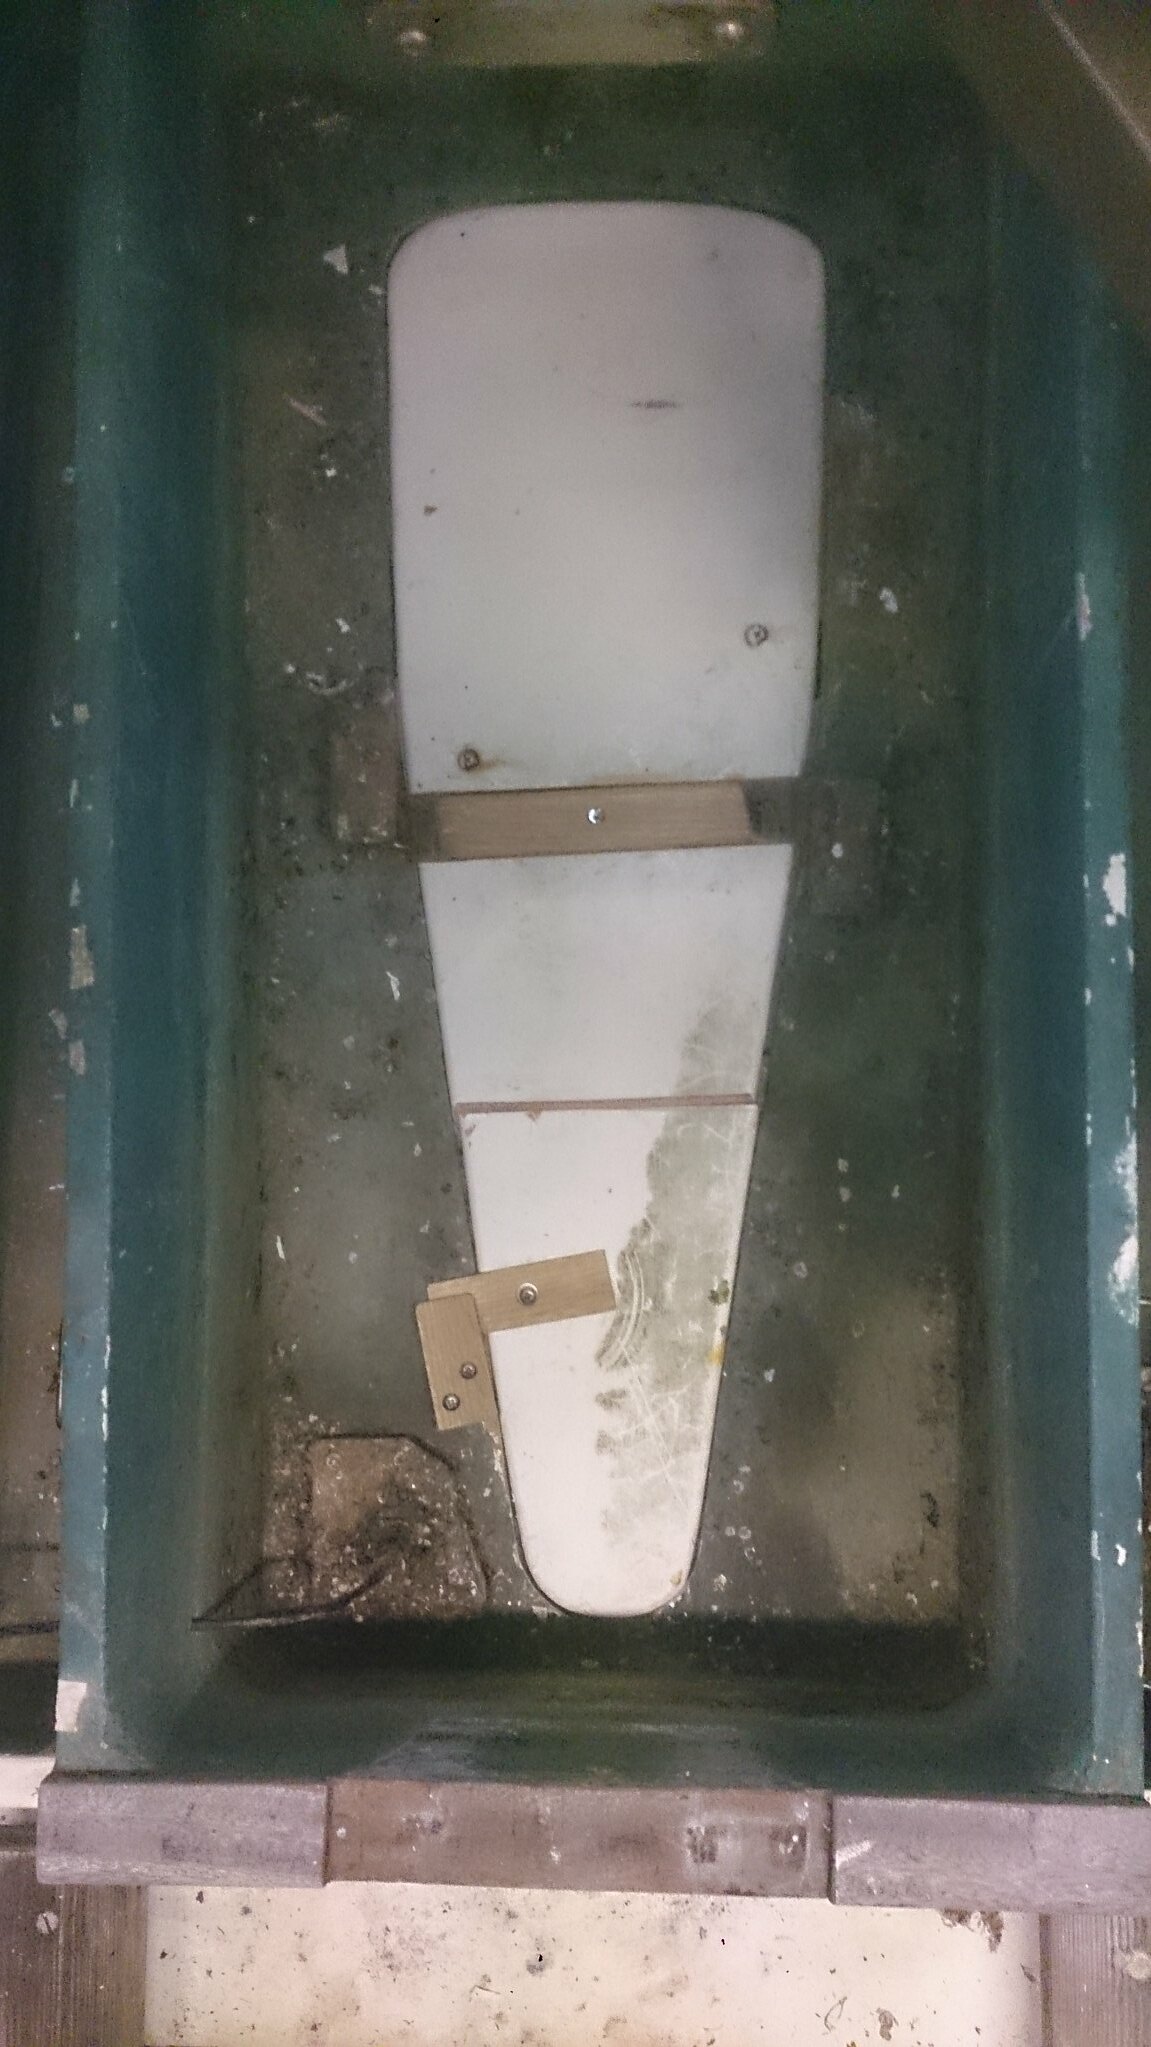 The forward part will be under water all the time as it is permanently in the well. I have considered various ways of hinging the larger part, but there just isn't room under the engine to do it in a simple to use way. But it will be much easier to fit in the shorter length. The small part will be held down with its own oak turn-buckle.
The short forward length will be hinged to the side of the opening with nylon hinges, so it can be flapped down when needed.
12 September 2014
Winter work starts, and it is only September


6 September 2014
Fantastic English Raid 66nm over a week


Brought Daisy G home. Decided it wasn't worth launching back at Poole for just a couple of weekends at the most. So the winter tinkering season is about to get underway.
27 August 2014
Off to the Raid

26 August 2014
Getting ready for hauling out. 7 nm
21 August 2014
Getting ready for deck repairs


18 August 2014
Maintenance day


11 August 2014
Wet and windy sailing 13.6nm
1 August 2014
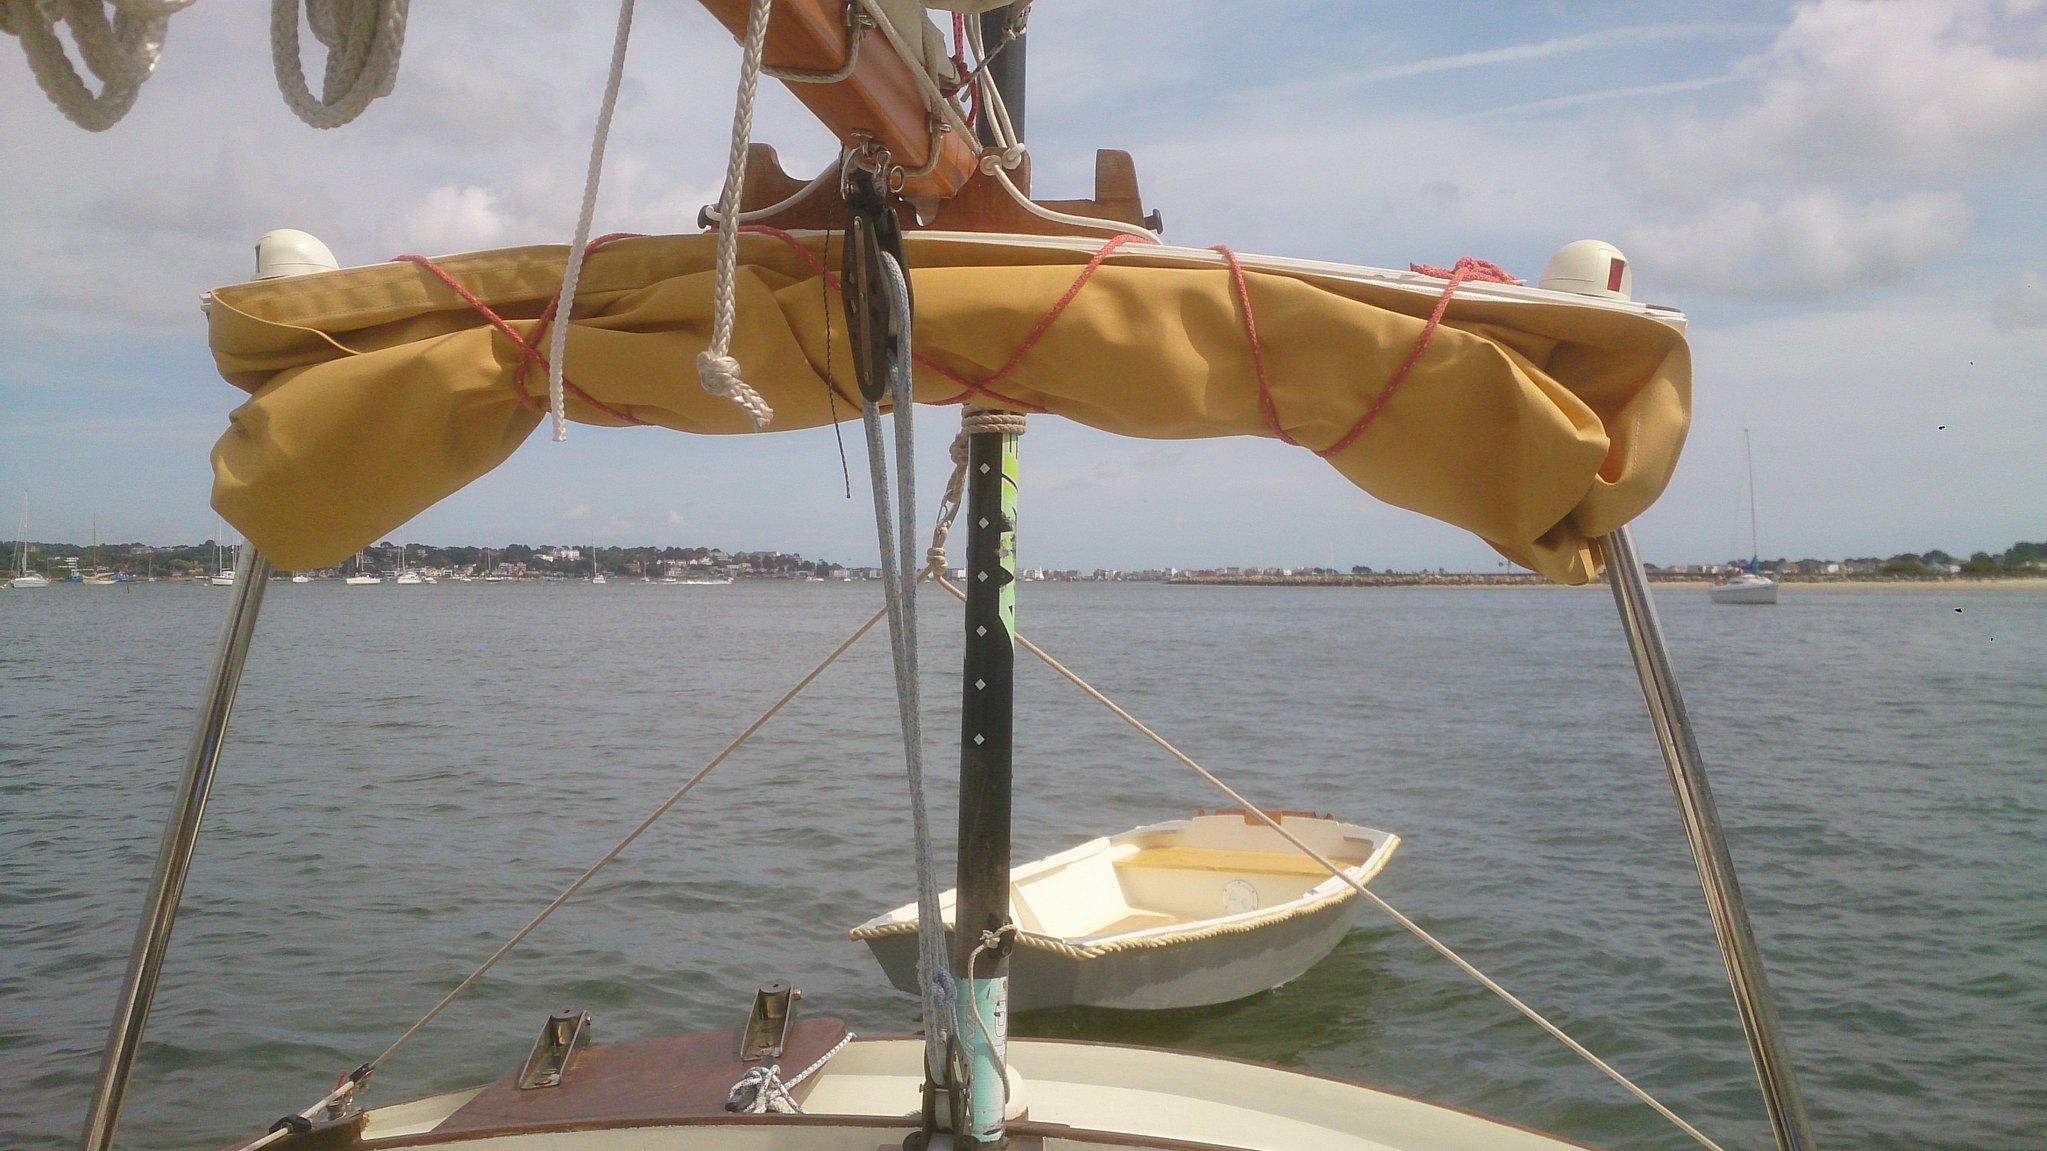
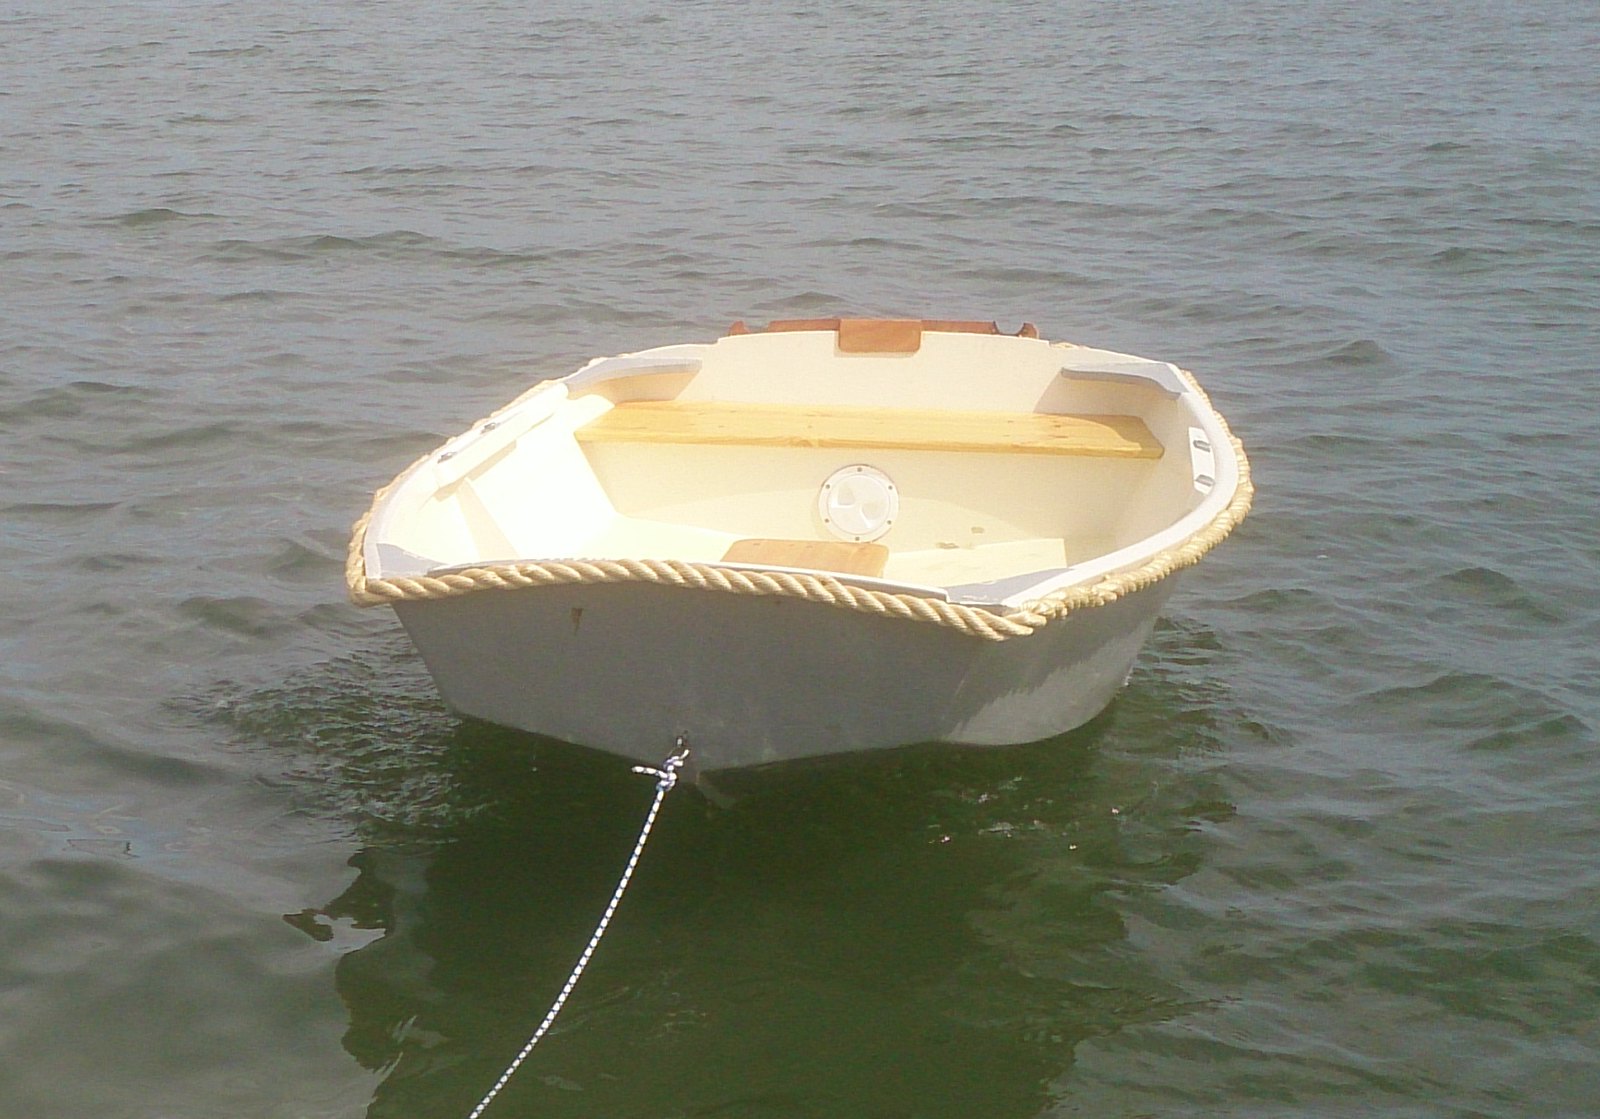
19nm sailing in the sunshine with a new dinghy


29 July 2014
Dinghy finished, yet to be launched.


23 July 2014
Dinghy progress


Subscribe to:
Posts (Atom)