27 January 2013

Back to work on canoe after a long break (2hrs)

What with Christmas, foul weather and three weeks away in the sun of South India, I haven't done anything on any of the boats for a long while. But spent two hours on the canoe this morning, completing all of the stringers. Next the gunwales need to be fitted. I am sure there is a sway in the end sections due to my getting the initial setting out wrong, but the rocker in the keel looks OK, so I hope it will go OK. There are a number of details to sort out on the woodwork after the gunwales, including fitting a thwart, but then it will be ready for the linen covering. Need some sunny weather to cure the resin after that.

24 December 2012

Forward half of two more stringers fitted (0.5hr)

Took an opportunity to fit the forward ends of two more stringers. The chamfers are very long and twisted now. Again the pull saw cuts most of it and a bit of sanding to fit it. All fiddly as each frame joint has to be glued, drilled, nailed and then surrounded in glue. Then the stem joint has to be copper riveted and bound with twine and glued all round.

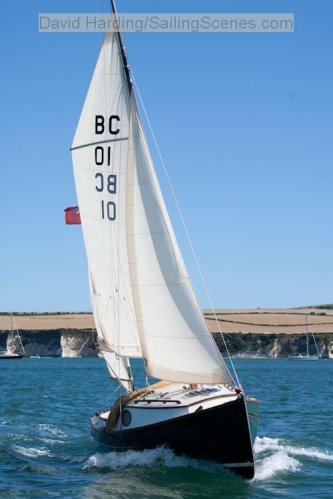
Finished restaining the hardwood on Daisy G. She is looking a well used boat, with many dents and dings in her rubbing strips, but that is what they are there for. Quite a bit of paint came off with the masking tape, so there will be some touching up needed. Inside of cockpit still to do in cream before I tackle the green hull.

22 December 2012

Four stringers fully fitted (1.5 hours)

I have fully chamfered and fitted four full length stringers. Six more to go. As usual, the work goes faster as you get used to it. Chamferring the ends against the stems is best done with the pull saw. Sanding is very slow with the multi tool. The stringers have more twist in them as they approach the keel, which is relatively easy to allow for with the saw, by lining it up parallel with the stem.

The lines of the stringers look a little depressed towards the ends. I think I misread the drawings slightly when setting up the keel/stem backbone. We live and learn.

21 December 2012

First stringer secured to bow (about 1hr)

I have cut and chamfered the bow ends of the first stringer and secured it in place. I tired sanding the chamfer, which works but is very slow as it is really quite long. I found that it is much quicker, and more accurate, to cut the bulk of the chamfer with a Japanese pull saw, and just finish it off by sanding. This makes rounding the surface much less likely.

This stringer is now glued and ring nailed from the centre frame to the bow frame. At the stem it is drilled right through and both stringers are held by a copper wire pushed through and clenched at each end, bound by strong twine through two positioning holes in the stem and then all bedded on Sikaflex. Bit messy but seems to work  well. I need to repeat at the stern and then fit all the remaining full length stringers. The end chamfers will get more acute and much longer as I approach the keel.

19 December 2012

Stringers dry fitted (1 hr)

I have pushed all of the full length stringers into place, which helps to show the overall shape of the canoe. They are just pushed into their respective slots on the frames and tied at the bows. The whole set up becomes quite rigid at this stage, but it was fairly out of shape by the time I had got them all in. I levelled everything up again and finally screwed the frame supports to the strong back and the main frames. The whole set up should stay in place now...

The next stage is to cut and chamfer the ends of the first stringers to fit the stem/stern, glue and nail that stringer to each frame and glue, pin and lash the stringers to the stem/stern. Then repeat for the remaining eight stringers. I think this is likely to be one of the longest stages of the process.