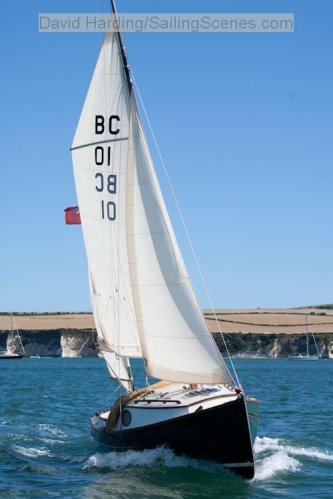
31 December 2010

Thoughts on logbooks

Drumming my fingers waiting for things to get going after the weather improves I have been thinking about my logbook for next year. I always keep one and have posted a few notes about what I record on the Swallowboats forum

I print my onw logpages and keep them in a very thin very old four ring binder (one I originally used for my formula 1 car designs back when Jochen Rindt was my hero. That was a VERY long tome ago). The binder fits into my chart holder, along with a ToughChart collection, so I can reach it from the cockpit. I just record where I have gone, how long it took and how far it was. I used to keep more detail, but decided that was for offshore sailors, which isn't me. On the left is a page from 2010's log showing how it is set out.


In 2011 I am going to try it in the landscape format below, to see if I can get more notes in as that is the most interesting part.

17 December 2010

Snow stops play on the shed


The snow and ice has arrived. The builder has got all the wall frames up, the door surrounds cut out and all the ceiling joists in place. The next stage is the sloping roof rafters, but everything is covered in ice and it is impossible to do any more.

I think it's not bad for four and a half days work when its freezing cold and dark at 4:00pm. Judging by the forecast (imminent arrival of the next Ice Age) I think it unlikely that anything more will be done until after Christmas.

The electrician came and measured up for installing a power supply. Inevitably he said that to comply with current regulations he would have to renew a lot of perfectly good fittings. I dread to think what his quote will be. He said he wouldn't be able to get it to me before Christmas. I told him I didn't want it before Christmas.


After the rafters, the window openings need to be trimmed and then the boarding starts to go on. Everything is here except the roof coverings, so I hope it won't take too long to finish the job. Famous last words.

16 December 2010

Roof joists going on

View from the garden
View from the lane

The shed speeds ahead, with nearly all the wall framing up and the ceiling joists starting to go on. The pitched rafters will be trickier but shouldn't cause much of a problem. It is good to get a feeling for the overall volume of the building at last and the size of the main door. The weather forecast is dire. One of the papers is predicting the worst snow storm in "100 years" tomorrow. On past experience that could mean we will get a thaw and some sunny weather, but who knows. Sadly I can't see the roof being on before that.

15 December 2010

On the backsides of boats

There were a couple of interesting comments on a previous post about the engine arrangement in Daisy Grace and I think it is worth looking at in some detail. I think the Swallowboats solution to the problem is one of the best I have seen, and it sold the basic Bayraider design to me.

I used to have a Drascombe Dabber and I loved it, but it was the only yawl rigged Drascombe I liked. It faced the usual problem of how do you get around the conflict of mizzen mast/rudder/tiller/outboard engine position. The Dabber solution was to mount the engine to one side, the very small mizzen on the transom on the other side and the rudder on the transom, with a long tiller that just cleared the engine.

The bigger Drascombe yawls adopted an arrangement that I always felt I could never have lived with. The engine right at the back, where it is hard to reach to tilt up and sticks out the back when tilted, not pretty. The mizzen in the middle in front of the engine, which is good. But then the rudder is in front of the mizzen mast, sticking down through the bottom of the boat. In a design meant for sailing in shoal waters I just do not understand this arrangement. You can see in this photo how the whole steel rudder assembly has had to be hauled up when going aground. How can this be a good idea? I have heard Drascombe sailors extolling all the different ways you can steer in shallow water with paddles and oars. I like steering with the rudder. If you get caught drying out with the rudder down, or worse, have a kick up blade which kicks up and thus jambs the rudder under the boat, you are in real trouble. I really don't like this arrangement.

The Swallowboat Storm series have a curious solution, with the tiller behind the mizzen mast. All users (and the builder) assure me it works perfectly well. I have never tried it but it looks weird to me.

The Bayraider/cruiser solution is based on the massive stainless steel rudder stock. This supports the tiller over the engine, but then dips down below a stern bridge-deck which supports the mizzen and then forms the rudder head outside the transom. The only opening in the transom is a small oval to allow the stainless steel tube to pass through. This allows the rudder to be on the back, the mizzen to be inboard on the centreline, the tiller in front of the mizzen mast, above the engine and the engine to be able to be tilted right up, out of the water and inside the boat.

The only problem I have with this arrangement is that when the engine is tilted, it does protrude into the cockpit. Not a problem with one or two aboard, but it does make it a bit cramped with three or four. A smaller engine takes up less room. I have got a 6HP outboard. A little 2.5HP Honda is more than adequate for the vast majority of situations. If you can be bothered you could lift it off and put it in the locker.


You could just leave the engine down but that has a few problems. It does increase drag, a lot. It makes it harder to steer and if you are a dumb as me you forget to tilt it up on a drying mooring. Fortunately I was on such soft mud it just pushed down into it. The best boat I have seen with a fixed down outboard was my old Winkle Brig. This used a deep GRP skeg to protect and streamline the submerged leg. It slowed the boat down but did mean you had a remarkably large cockpit for a 16ft boat with a three berth cabin.

Shed frame nearly complete after two days

The basic frame is up, bar the panel to the righ tof the main door. Not bad progress for two cold, short winter's days. The window openings are to be cut out next. I am not planning any heating this year, so no internal insulation or lining, but I may put in a wood burning workshop stove at some stage if I start doing serious projects. I will need to insulate it if that is to be worth while, so that will be a future project.

14 December 2010

Shed framework going up fast

The builder only started on the shed framework yesterday morning and this was the state this morning. He is working as fast as he can as more dreadful weather is forecast after tomorrow. Can't see the roof being on by then, but who knows? Nearly all the wall frames have been finshed, they just have to be stood up and screwed down. Will Daisy G be undercover before Christmas? It could happen, depending on snow, ice, sleet, wind etc.

13 December 2010

Overall view of BayCruiser

This photo is a mosaic of two I took during the English Raid (can you spot the join?), looking down on Daisy G at low tide from the quayside at Keyhaven. I think is gives a very good view of the Baycruiser form. They are really quite beamy, although quite narrow at the waterline. This is partly why they have such high form stability. As soon as she starts to heel, a great chunk of the overhanging side is forced into the water and this in turn pushes buoyantly back. She is very stable even without the water ballast, but rock solid with it.


This photo, taken from the same quayside, shows a comparison between the original Bayraider (Simon Knight's fibreglass Carpe Diem in this case) and the Baycruiser. They really are quite different. The surrounding bulwark on the BC gives a really nicely enclosed foredeck. There is also no under-sidedeck stowage on the Bayraider, which is so useful on the Baycruiser (see the previous post to see the boathooks stored in this area). On the other hand, it has bigger under bench cockpit lockers on both sides plus a huge storage area under the foredeck. The original proposed cabin verison of the Bayraider was to have just a slightly raised and extended foredeck to form a "camping cuddy". I think there are still plans to pursue this. I wanted a full cabin to use as my Wendy house, as my wife describes it. Simon and I are convinced the  Baycruiser is significantly longer than the Bayraider, more than the specified 5 inches, but we never got round to actually measuring them.

This angle also clearly shows the original and revised positions of the jib sheet fairlead tracks. The originals, on the  cabin roof, were too close to the centreline, despite Matt insisting that they met all the theoretical design requirements. The new positions on the grab rails are a bit odd looking but work well. I am going to remove the original tracks over the winter.

Just to complete the comparison. This view gives an idea of the different cockpits of the Raider and Cruiser. The under side deck stowage shows up clearly. You can also see my stern ladder in its "deployed" position and the tiller control line, which hooks over a cleat on the under side. Knots in the line stop the tiller slipping and bungees at each end make it easy to whip on and off.


Just to complete the picture, this is the design that started it all, a Searaider, Pelham Olive's Lattis, tied up alongside Daisy G at Buckler's Hard. This is a racing boat with twin headsails on a permanent bowsprit, all sorts of adjustment tackles and a tiller controlled by tiller lines aorund the engine well. They even had trapeze wires. But... they had to sleep on board the Thames barge mother ship, whilst my daughter and I slept comfortably aboard Daisy Grace for five nights. Horses, or boats, for courses.

And finally (is there ever a finally) the one they are all talking about, the Bayraider 17, under sail and under tow. This is Matt Newland's own boat. I think it is a stunner. It is so sleek and simple inside. I see this as a big seller and a real replacement to the Drascombe Dabber, which was always my favourite.


The shed builder arrived on site this morning and started sawing bits of wood! Yay!

12 December 2010

New bulkhead going in

The weather has eased up at last and I could do a few jobs over the weekend. I have finished the main part of the new internal bulkhead and fixed it in place. It is held between hardwood strips glued to the cabin wall and ceiling, which should mean that it can be removed if it is a bad idea. But that will involve breaking the panel, it can't go in or come out as a single piece. I still have to fit a filling panel between the new bulkhead and the sloping compression post. That is made up and is curing in the utility room. So far I am happy with the result, but it is hard to judge until all the cushions and general cabin detritus is in place.

I have fitted two screwed and glued blocks under a cockpit side deck which support two staineless steel hooks each. These are to hold the boat hooks so that they don't slide around but have a place to live. The long boat hook is used to hook mooring buoys. It is meant to be adjustable but has seized solid, fortunately at the maximum length which will fit under the side deck. The wooden boathook is an Irish heirloom from my first Drascombe. It goes in every boat with me. It has 0.25m markings on it so I cab use it as a shallow water sounding rod, for which use it is perfect.

9 December 2010

Small bits of work in freezing weather

I can't do anything on the boat because it is so cold. I have been working on the new bulkhead I want to install in the house. Basically it is 9mm t&g pine boarding screwed and glued to a 4mm plywood backing. The plywood is in two sections, partly because that was the maximum width available locally, but in fact a complete panel would be impossible to fit into position because of the  taper of the cabin roof. The joint is covered by the third board in from the right. I have dry fitted it and it does fit, all be it very tightly. The sequence is: the boards are screwed on to the plywood on a layer of "no more nails" wood glue. When the glue is set, the screws are removed, and this has worked, more or less. (Poor man's vacuum bagging.)

When I have fitted the two parts in place, the final loose board will be snapped into place and screwed and glued to the plywood over the joint. Then the screws will be removed when the glue is set and hopefully I will have a reasonably flat panel of tongued and grooved boarding to the main cabin and smooth ply into the "fore cabin". I will fill and undercoat the bulkhead panels in the house and just put the top coat on in the boat when it is warm enough, after filling in last screw holes and the panel joint.

One dodgy thing I have done. Two of the boards cupped quite badly (curved up due to expanding on the sides facing the plywood). I have sprayed the outer face of these boards with a water spray for the last two days, and they have actually flattened. Whether this will hold after I have painted it is anyone's guess. I can see why professionals use vacuum bagging. It is impossible to clamp baords flat fully any other way. Screws don't really do it.

5 December 2010

Wintery storage

When the builder will be able to start again is anyone's guess as the weather is awful. Barely above freezing and we have lying snow up here in the hills. I can see Daisy G up the garden from our study, standing on the shed base.All the wood is there as well, the ultimate Ikea flat pack. It just needs to be cut, nailed and painted. At -5C...

3 December 2010

Shed planning approved

Just heard that our boatshed plans have been approved so now we can carry on building. Shame there is two feet of snow on the site rather than on the roof of the finished shed as originally planned. Such is life.